Table of Contents
- What Casting Directors Look For in Actor Headshots
- Actor Headshot Lighting Setup: Key Light, Fill Light, and Rim Light
- Natural Light Actor Headshots: When Window Light Works Best
- Three-Point Lighting for Portraits: A Step-by-Step Setup
- Headshot Lighting Techniques for Skin Tone, Glasses, and Hair
- Lighting on a Budget: Portable Kits and One-Light Setups
- Common Lighting Mistakes That Ruin Actor Headshots
- Frequently Asked Questions
Last Updated: October 13, 2026
What Casting Directors Look For in Actor Headshots
The best lighting for actor headshots in DC makes you look like yourself on a good day.
This guide covers actor headshot setups, from a one-light rig to a full three-light arrangement.
So what do casting directors actually check?
- Eyes that read clearly, with visible catchlights
- Skin tone that looks natural, not washed out or orange
- A jawline and cheekbones that stay defined in shadow
A casting platform guide to headshot requirements makes the same point: your photo should look like you walked in the room. That single rule decides almost every lighting choice below.
Actor headshots are a casting tool, not an art project. If a lighting choice hides your features instead of showing them, skip it.
Actor Headshot Lighting Setup: Key Light, Fill Light, and Rim Light
An actor headshot lighting setup uses three roles, even with one light. The key light shapes the face, the fill light softens the shadows the key creates, and the rim light sits behind you to separate your head from the backdrop.
Positioning the Key Light for Flattering Facial Features
Place the key light about 45 degrees to one side of your face and slightly above eye level. That angle adds structure under the cheekbone and jaw without going dark; closer to the camera flattens the face, and further to the side reads as a character choice, not a headshot.
For most actors, a soft key is safer: it wraps around the face and hides small skin texture issues. Hard light looks striking for film and TV submissions but shows every flaw.
Fill Light and Rim Light: Controlling Shadows and Background Separation
Fill light does not have to be a second lamp. A reflector on the shadow side bounces the key back in and lifts the shadows, the cheapest fill you will ever buy.
The rim light goes behind you, aimed at the back of your head and shoulders, creating a thin bright edge that pulls you off the background. Without it, dark hair on a dark backdrop becomes one solid shape.
- Key light: 45 degrees off-axis, slightly above eye level
- Fill: reflector or a second light at low power, opposite the key
- Rim: behind and above, pointed at the back of your head
Natural Light Actor Headshots: When Window Light Works Best
Natural light actor headshots work best when you stand a few feet back from a large window, facing it at an angle. The window becomes a huge softbox: soft, even, and free. But in this region it is a seasonal tool, not a year-round plan.
Seasonal Daylight and Weather Realities
Daylight here swings hard across the calendar. Near the winter solstice, a 4 p.m. December session is already fighting dusk; near the summer solstice, the sun is still high at 7 p.m. and a west-facing window throws hard, hot light into the evening.
- Winter: book mid-morning to early afternoon. Aim for the window with the longest unobstructed exposure, usually south-facing.
- Spring and fall: the most forgiving window. Soft, directional light lasts most of the day.
- Summer: north-facing windows stay cool and even all day. West-facing windows turn harsh after about 3 p.m.
Weather matters too. Overcast days turn any window into a giant diffuser, ideal for soft, even skin; clear days give harder, directional light that needs diffusion or a bounce card.
Indoor Constraints That Shape the Shoot
Most actor headshot sessions happen indoors, and the room decides the light. Tall south-facing row house windows give a soft, wrapping key; floor-to-ceiling glass with bright white walls bounces so much the face flattens; a basement with one small window gives you almost nothing.
Check three things before you commit to a window:
- Window size and height. A window taller than the subject and at least 3 feet wide behaves like a softbox. A small window behaves like a bare bulb.
- What is outside. A brick wall or hedge across the street bounces warm light back in. A parking lot or white building bounces harsh glare.
- What is inside. Light-colored walls and ceilings act as free fill. Dark walls eat the light and deepen shadows.
Positioning and Exposure for Window Light
Stand square to the window and the light flattens your features; turn 30 to 45 degrees so one side falls into gentle shadow and you get shape back.
Starting settings for window light:
- Aperture: f/2.8 to f/4 for a soft background, f/5.6 if you want the backdrop readable
- Shutter speed: 1/125 or faster to avoid motion blur from a seated subject
- ISO: raise only as needed; window light is often dimmer than it looks
a headshot photographer’s guide to natural versus studio light notes that natural light tends to look flatter on skin, while studio setups give a more polished, consistent result. Both are true, and both can work.
Do not shoot natural light headshots with the window behind you. Backlighting blows out the background and leaves your face in shadow, which is the opposite of what casting directors need to see.
If you are scouting a room, visit at the same time of day as your session. A window that looks perfect at noon can be useless by 3 p.m.
Three-Point Lighting for Portraits: A Step-by-Step Setup
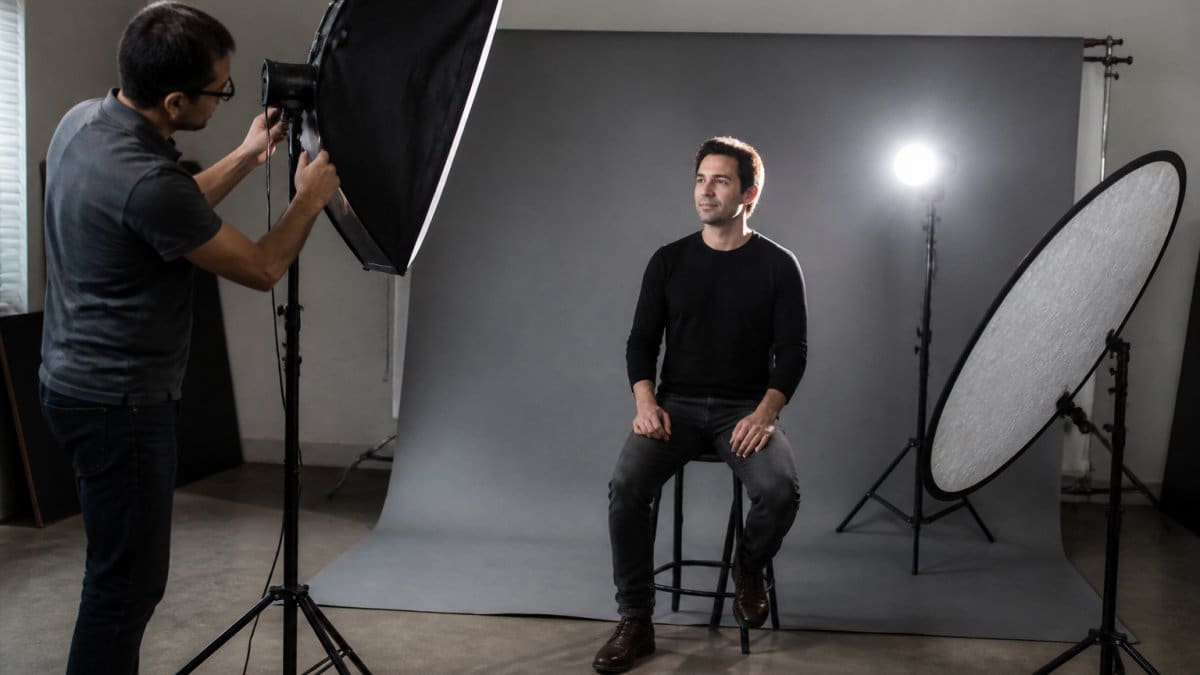
Three-point lighting for portraits is the standard studio arrangement and takes about 20 minutes to build. Here is a common sequence, with repeatable numbers.
The Setup, Step by Step
- Set your backdrop and seat the actor 4 to 6 feet in front of it; closer and rim-light shadows fall on it, farther and the background goes dark.
- Place the key light 45 degrees to one side, slightly above eye level. A 3-foot softbox or 43-inch shoot-through umbrella at 4 to 5 feet gives a soft, wrapping key.
- Put a 32-inch 5-in-1 reflector on the opposite side, 2 to 3 feet from the face, angled to bounce light into the shadow side.
- Add the rim light behind and above, pointed at the back of the head. A bare speedlight at 1/4 to 1/2 power, 3 to 4 feet behind, creates a clean edge.
- Take a test frame and check the catchlights in both eyes; they should sit at roughly 10 o’clock or 2 o’clock.
- Adjust the key until the shadow under the nose is soft, not harsh. If the edge is sharp, move the light closer or add diffusion.
Power Ratios and Exposure
A common starting ratio is 2:1 key to fill, which keeps shadows open and readable. For dramatic character headshots, push to 4:1 or 8:1 but keep the eyes lit. The rim usually sits 1 to 2 stops above the key so the edge reads without blowing out.
Starting camera settings:
- Aperture: f/4 to f/5.6 for a sharp face with a softly blurred background
- Shutter speed: 1/125 or faster, and within your camera’s sync speed if you are using strobes
- ISO: 100 to 200 in studio; raise only if you are working with continuous lights
One-Light and Two-Light Variations
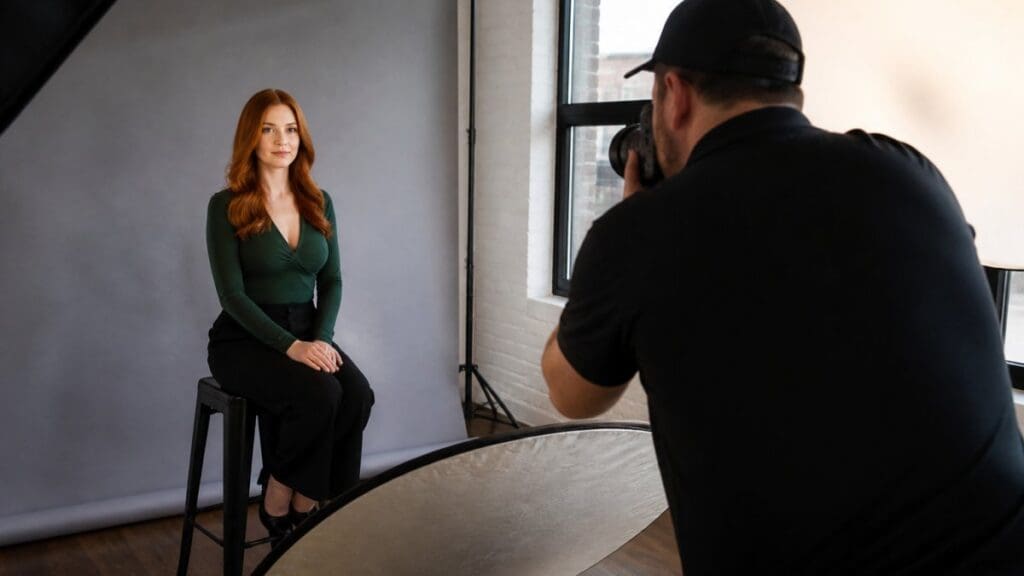
You do not need three lights for a casting-ready headshot. A one-light setup with a reflector handles most sessions: key at 45 degrees, reflector opposite, no rim, fastest and hardest to get wrong. A two-light setup swaps the reflector for a second light at low power for more control over shadow density. Add the rim only when hair or clothing would merge into the backdrop.
The three-point setup is a starting point, not a rule. The goal is a face that reads clearly, not a diagram that matches a textbook.
Headshot Lighting Techniques for Skin Tone, Glasses, and Hair
Headshot lighting techniques have to change with the person in front of the lens. One setup does not fit every face, and pretending otherwise produces images that need heavy editing later.
Adapting Light Quality for Different Skin Tones
Darker skin tones often look best with a slightly stronger key and a fill that does not overcorrect, too much fill turns deep skin gray and flat. Lighter skin tones blow out fast under a hard key, so soften the source or pull it back.
The fix in both cases is the same: meter for the face, not the background, and check the image on a calibrated screen.
Reducing Glare and Managing Shadows with Glasses and Hair
Glare in glasses comes from the angle of the light, not the glasses. Drop the key lower and shift it further to the side until the reflection leaves the lens; raising the light above the frame and tilting the head down also clears it.
Hair needs separation. Dark hair on a dark backdrop disappears without a rim light. Fine hair catches a rim light beautifully, so keep the rim slightly behind the crown.
- Glasses: lower and angle the key, tilt the chin down
- Dark hair: always add a rim light
- Fine or thinning hair: keep the rim behind the crown, not at the temples
Lighting on a Budget: Portable Kits and One-Light Setups
A one-light setup with a reflector handles most actor headshots and fits in a single bag.
Portable kits matter because sessions often happen in small spaces, a rented room, a friend’s apartment, a co-working space.
What most guides miss is that the modifier matters more than the light. A cheap speedlight through a large softbox looks softer than an expensive strobe shot bare.
Bring a white foam board to every session. It costs almost nothing, folds flat, and works as a fill card when your reflector is on the wrong side of the room.
Common Lighting Mistakes That Ruin Actor Headshots
The biggest mistake is lighting for drama instead of clarity. Low-key lighting looks cinematic, but casting directors cannot judge a face they cannot see.
Other common mistakes:
- Light too high, which drops the eyes into shadow and kills catchlights
- No rim light, so dark hair merges into the backdrop
- Mixed color temperature, with a warm lamp on one side and daylight on the other
- Overfilled shadows, which flattens the face into a passport photo
One more: retouching that removes features. Casting directors notice when a nose has been slimmed or a jaw reshaped.
If you would rather not manage any of this yourself, a professional photography session removes the guesswork and delivers images built for casting platforms from the start.
Lighting for actor headshots is a technical skill, and getting it wrong costs you auditions before anyone reads your resume. Event Photojournalism delivers award-winning, high-resolution photography services across the DMV area from our Washington DC and Northern Virginia locations.
Frequently Asked Questions
What should a professional acting headshot look like?
A professional acting headshot should look like you on a good day, with clear, even lighting that shows your facial features and expression. It should be well-lit with no harsh shadows, sharp focus, and a simple background that keeps attention on your face. The goal is to look natural and approachable, not overly dramatic or heavily retouched.
Is natural light or studio light better for actor headshots?
Both natural light and studio lighting can work well for actor headshots. Natural light from a window can look soft and flattering, but it changes with weather and time of day. Studio lighting gives you consistent, controllable results with tools like softboxes and reflectors. Many photographers use a mix of both to get the best of each.
How do you avoid harsh shadows in a headshot?
To avoid harsh shadows, use a large light source close to your subject, like a softbox or a window with sheer curtains. Add a fill light or reflector on the opposite side to bounce light into shadow areas. Keep the light at a 45-degree angle from the face and avoid pointing it directly from above or below, which creates unflattering shadows.
What is the 3-light rule in photography?
The 3-light rule, also called three-point lighting, uses a key light as the main source, a fill light to soften shadows, and a backlight or rim light to separate the subject from the background. This setup adds depth and dimension to portraits. You can adjust the intensity of each light to create different moods, from soft and even to dramatic and cinematic.