
Table of Contents
- Step 1: Define Your Brand Activation Objectives and Documentation Scope
- Step 2: Build Your Pre-Event Documentation Plan
- Step 3: Capture On-Site Data and Engagement Metrics
- Step 4: Apply Event Photography Best Practices for Your Brand Activation
- Step 5: Measuring Brand Activation Success Through Data and Feedback
- Step 6: Use a Brand Activation Recap Report Template to Compile Results
- Step 7: Post-Event Documentation Workflow and Internal Reporting
- Legal and Compliance Documentation for Brand Activations
- Frequently Asked Questions
Last Updated: September 13, 2026
Step 1: Define Your Brand Activation Objectives and Documentation Scope
A brand activation is a live or digital experience designed to create a direct, memorable interaction between a company and its audience. Documentation starts before the event does, because what you capture is only as good as what you decided to measure.
Industry guidance for 2026 recommends setting one primary objective and two to three supporting key performance indicators before the activation begins, according to Rent For Event’s 2026 brand activation guide. That single decision shapes everything downstream: which moments your photographer prioritizes, which attendee interactions you count, and which numbers make it into the final report.
Pick one primary goal, such as brand awareness at scale, then attach two or three supporting metrics: total attendance, dwell time, or social media amplification. Write them down before the venue doors open.
Step 2: Build Your Pre-Event Documentation Plan
A pre-event documentation plan is a written list of every asset, data point, and moment you need to capture, assigned to a specific person and time. Without it, you get a folder of random photos and a spreadsheet nobody trusts.
Creating a Shot List and Asset Checklist
Your shot list should name the exact moments that matter: sponsor signage, the ribbon moment, VIP arrivals, audience interaction at the main touchpoint, and candid reactions during the keynote. Pair it with an asset checklist:
- Primary objective statement (one sentence)
- Supporting KPIs with target numbers
- Shot list with named VIPs and sponsor logos
- Data capture method (check-in scans, dwell-time sensors, or manual counts)
- Attendee feedback channel (survey link, comment cards, or on-site interviews)
- File naming convention and cloud folder structure
Brief your photographer on who matters before the event, not during it. Send headshots of board members, sponsors, and speakers with pronunciation notes. It’s the difference between a usable recap and a folder of strangers.
Step 3: Capture On-Site Data and Engagement Metrics
On-site data capture is the practice of recording quantitative engagement during the activation itself, in real time, so post-event analysis rests on evidence rather than memory. The 2026 documentation standard combines on-site engagement data with post-event results, tracking total attendance and dwell time as core metrics, per Pavegen’s guide to measuring brand activation ROI.
Most teams under-document this phase because they treat data capture as a side task. The fix is to assign two distinct roles before doors open: a data lead and a visual lead. The data lead owns numbers; the visual lead owns the moments that explain those numbers. Neither role should be the event manager, who will be pulled into logistics the moment something breaks.
What the Data Lead Logs, and How Often
A workable cadence is a 15-minute scan of every touchpoint, logged into a single shared sheet with a timestamp column. That interval is short enough to catch peak traffic windows and long enough that one person can actually keep up. At minimum, capture:
- Check-in counts, scanned badges, a manual tally clicker, or a tablet-based check-in app. Note the timestamp of every count so you can chart arrival curves later.
- Unique touchpoint interactions, a staff tally per station, not a guess. If a station has three sub-activities, tally each one separately.
- Dwell time at the anchor moment, timed observation of a sample of attendees (for example, every tenth person through the main experience) is more reliable than trying to time everyone.
- Peak traffic windows, the 15-minute blocks where counts spike. These become your staffing and layout lessons for next year.
- Sentiment flags, a one-word note when you observe a strong positive or negative reaction. “Crowded at 7pm” is data; so is “queue moved fast.”
What the Visual Lead Captures in Parallel
The visual lead shoots to the shot list, but also shoots to the data. If the data lead flags a spike at 6:45 p.m., the visual lead should already have wide frames of that crowd. Pairing images to time-stamped counts is what turns a photo folder into an ROI story.
Run a five-minute sync between the data lead and visual lead at the top of every hour. It’s the cheapest way to make sure the numbers and the images describe the same event.
Common Trade-Offs
Sensor-based dwell tracking is more accurate than manual timing but adds setup cost and a data-privacy review (see the compliance section below). Manual counts are free but degrade after about 90 minutes of continuous tallying, rotate the data lead or bring a second counter for events longer than two hours. Pick the method you can actually sustain for the full run of show, not the most sophisticated one on the vendor’s demo.
Step 4: Apply Event Photography Best Practices for Your Brand Activation
Event photography best practices for a brand activation come down to three rules: shoot candid first, capture branding in context, and stay invisible while you do it. Posed grip-and-grin shots have their place, but they rarely carry a fundraising appeal or a press release.
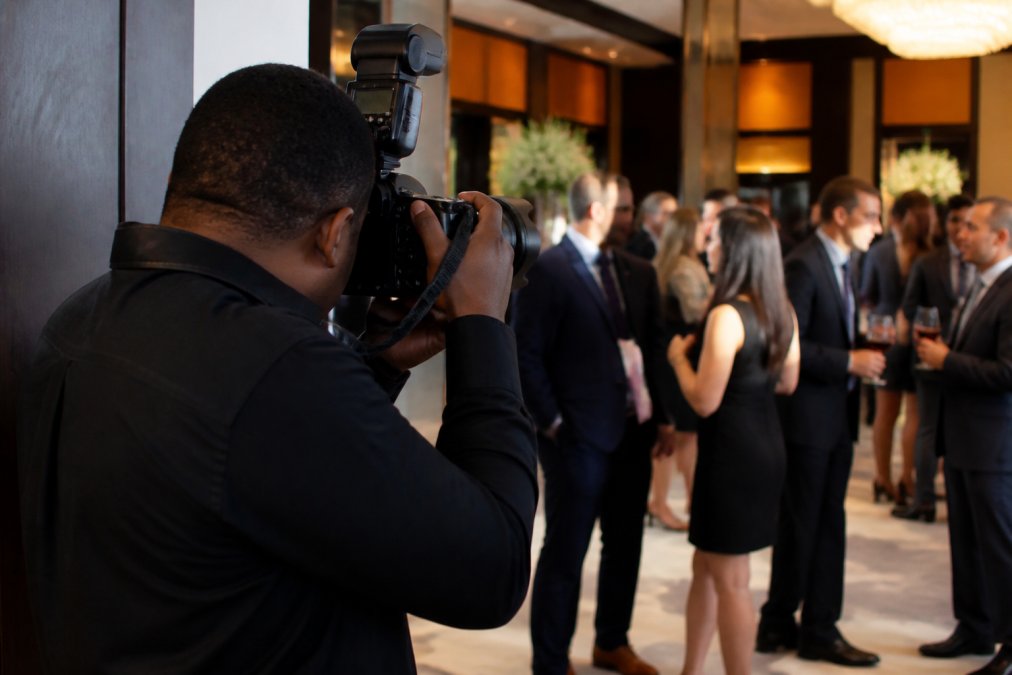
Shoot wide, medium, and tight at every key moment. Wide frames show scale and signage; medium frames show interaction; tight frames capture genuine expression. Deliver high-resolution files so your communications team can drop them straight into a donor email or LinkedIn post.
Step 5: Measuring Brand Activation Success Through Data and Feedback
Measuring brand activation success means pairing hard engagement numbers with qualitative attendee feedback, then comparing both against the objectives you set in Step 1. Neither half tells the full story alone.
Documentation should record both positive and negative consumer interactions, whether the activation happens through a digital campaign or a live activity, according to ZoomInfo’s beginner’s guide to brand activation. Analyze attendee feedback through customer surveys, direct comments, and observed reactions, per BrandActivate’s event reporting guidance. A comment card that says “too crowded at 7pm” is as valuable as a glowing quote.
| Metric | How to Capture | What It Tells You |
|---|---|---|
| Total attendance | Check-in scans or manual count | Reach against target |
| Dwell time | Timed observation or sensors | Depth of engagement |
| Touchpoint interactions | Staff tally per station | Which activations worked |
| Social amplification | Hashtag and mention tracking | Organic brand visibility |
| Attendee sentiment | Surveys and comment cards | Brand loyalty signal |
Step 6: Use a Brand Activation Recap Report Template to Compile Results
A brand activation recap report template is a reusable document structure that turns raw photos, numbers, and quotes into a single shareable summary. Build it once, and every future event gets faster to report. Standardizing this output creates a consistent narrative that serves as the foundation for growing event audiences across your digital channels.
A workable template has six sections: objective and KPIs, attendance and engagement data, a curated photo selection, attendee feedback highlights, sponsor and partner visibility, and recommendations for next time. Keep the photo section tight. Ten strong images outperform sixty mediocre ones, and your executives will actually read the report.
Don’t wait three weeks to deliver images. Press releases and board follow-ups move within days of an event. If your recap lands after the news cycle, the visual assets lose most of their value.
Step 7: Post-Event Documentation Workflow and Internal Reporting
A post-event documentation workflow is the sequence that moves assets from camera to archive to internal report, with a named owner at each stage. Most teams skip this step, and it’s exactly where competitors fall short.
Run it in four stages: ingest and back up files the same night, cull and color-correct within days, compile the recap report within a week, then archive everything in a shared, searchable folder. Internal reporting should include a short executive summary, the KPI table, and a link to the full asset library. This is the difference between an event that happened and an event your organization can prove worked.
Legal and Compliance Documentation for Brand Activations
Legal and compliance documentation covers the permissions, releases, and usage rights that let you publish what you captured. It is the least glamorous part of the job and the most expensive to skip, and it is the section almost every competing guide omits entirely.
Releases and Consent Forms You Need Before Doors Open
- Model release, signed by any identifiable attendee whose image may appear in marketing, advertising, or paid social. A general event ticket disclaimer is not a substitute for a release when the image is used to promote the brand.
- Minor consent, a guardian signature for anyone under 18. Many venues also require the guardian to be present. Build a separate sign-in sheet for minors so you can match faces to forms later.
- Property and venue release, confirms you may photograph inside the space and publish those images. Some venues restrict photography in specific zones (back-of-house, sponsor lounges, art installations).
- Sponsor and partner logo usage agreement, specifies where and for how long you may use each partner’s marks in the recap, on social, and in paid placements.
- Talent and speaker release, covers keynote footage, panel recordings, and any repurposed clips.
Data Privacy: What Changes When You Scan, Film, or Track
If you collect personal data, check-in scans, email sign-ups, dwell-time sensors, or facial recognition, you trigger privacy obligations. Two frameworks matter most for a U.S. activation:
- CCPA/CPRA (California), if you collect personal information from California residents, you must provide notice at or before collection, honor deletion and access requests, and disclose how the data will be used. This applies to event check-in apps and lead-capture forms, not just websites.
- Biometric privacy laws, Illinois’ BIPA and similar state statutes require written notice and a signed release before collecting biometric identifiers such as fingerprints or facial geometry. If your activation uses facial recognition for dwell tracking, get legal review before the event, not after.
A practical rule: any data field you collect on-site should have a stated purpose, a retention period, and a named owner. If you cannot answer “why do we have this?” for a field, delete it from the form.
Storage, Retention, and the Paper Trail
Keep signed releases, consent forms, and privacy notices in the same event folder as your photos and data, not in a separate legal drive nobody can find. A common retention pattern is to hold releases for the life of the marketing campaign plus a buffer, and to hold raw attendee data only as long as the stated purpose requires. When a donor, sponsor, or regulator asks why a specific image or data point exists, you want the answer in seconds, not days.
A photo without a release is not an asset, it’s a liability. If you can’t produce the signed form, don’t publish the image, even if it’s the best shot from the event.
Build a one-page compliance checklist into your pre-event documentation plan: releases collected, privacy notice posted, data fields justified, retention period set, owner named. It takes 20 minutes to draft and saves weeks of cleanup later.
Frequently Asked Questions
What should be included in a brand activation recap report?
A strong recap report includes your primary objective, the KPIs you set, total attendance, dwell time, attendee feedback, and visual assets. Industry guidance for 2026 recommends a four-layer framework covering reach, dwell time, and ESG impact. Include both positive and negative consumer interactions, whether from digital campaigns or live activities. Add customer survey results and observed reactions to give stakeholders a complete picture of how the brand activation performed.
How do you measure the success of a brand activation?
Start by setting one primary objective, such as brand awareness at scale, plus two to three supporting KPIs. Track total attendance, dwell time, and engagement rates on-site, then combine that with post-event results like social media amplification, lead generation, and conversion rate. Measuring brand activation success also means recording qualitative data: attendee feedback, direct comments, and observed reactions. Compare results against your campaign objectives to determine ROI.
Why is professional photography important for documenting a brand activation event?
Professional photography gives you high-resolution visual assets for annual reports, press releases, donor relations, and social media. Candid, photojournalistic coverage captures authentic attendee interaction and brand visibility that phone snapshots miss. For nonprofits and associations, these images support fundraising campaigns and sponsor recaps. Event photography best practices include capturing key touchpoints, VIP moments, and signage without disrupting the attendee experience.
How do you document the ROI of a brand activation?
Document ROI by pairing on-site engagement data with post-event results. Track reach, dwell time, and ESG impact using a structured framework. Collect attendee feedback through surveys and direct comments. Then connect those numbers to business outcomes: lead generation, conversion rate, and brand loyalty indicators. A brand activation recap report template helps you organize this data consistently so you can compare events over time and show stakeholders exactly what the investment returned.
Documenting an activation well is a discipline, and it’s one most teams underestimate until the recap deadline hits. Event Photojournalism brings award-winning photography, customized coverage for conferences, galas, and corporate events, and high-resolution delivery built to serve your fundraising and donor relations from day one. Contact us to plan coverage that elevates your brand, amplifies your message, and maximizes your mission.