Table of Contents
- Why Preparation Determines Your Results
- Professional Photoshoot Outfit Ideas That Work on Camera
- Grooming Tips for Professional Headshots and Full Sessions
- How to Pose for Professional Photos Without Looking Stiff
- How Long Does a Professional Photoshoot Take?
- Building a Mood Board and Creative Brief
- What Happens After the Shoot: Retouching and Delivery
- Conclusion
- Frequently Asked Questions
Last Updated: September 16, 2026
Why Preparation Determines Your Results
Lighting determines 60% of a headshot’s quality, according to Capturely’s technical breakdown of headshot production, and the remaining 40% depends on what you bring to the session. That is why knowing how to prepare for a professional photoshoot matters more than the camera body, the lens, or the studio. At Event Photojournalism, we have photographed corporate conferences, galas, and board summits across the DMV area, and the pattern never changes: prepared subjects often need less retouching, finish faster, and like their images more.
Preparation is not vanity. It is production planning.
Below, we break down exactly how to prepare, from wardrobe and grooming to posing and post-shoot delivery. The recommendations follow the same standards we apply to our own award-winning coverage.
Professional Photoshoot Outfit Ideas That Work on Camera
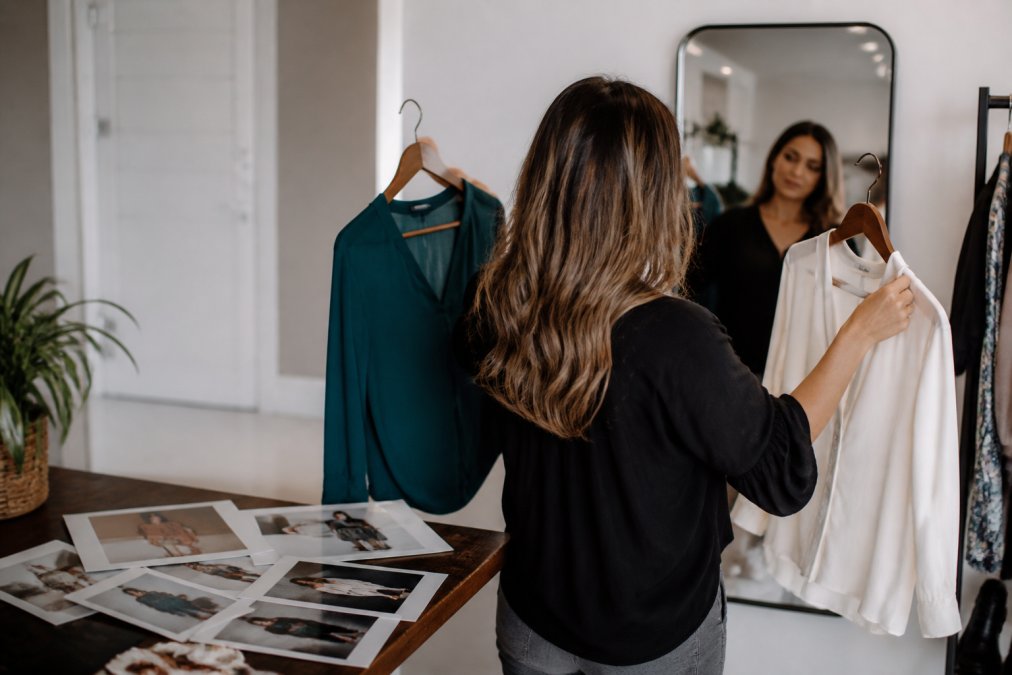
Solid-colored tops in mid-tone shades photograph best because they keep attention on your face rather than your clothing. Skip busy prints, thin stripes, and large logos; all three create distracting patterns that fight the camera sensor.
Solid Colors, Flattering Silhouettes, and What to Avoid
Build your professional photoshoot outfit ideas around flattering silhouettes: structured shoulders, defined waistlines, and sleeves that end mid-arm rather than at the widest point. Jewel tones, navy, charcoal, and deep green flatter most skin tones. Avoid pure white and pure black unless your photographer has tested them against the background.
One contrarian note from working photographers: skip whatever is trending this season. Following current fashion and hair trends makes portraits look dated within a year or two, which is why timeless, solid-colored clothing wins for images you will reuse on LinkedIn, annual reports, and press materials for the next 24 months.
Bring three outfit options to the session, not one. Wardrobe shifts take five minutes and give your photographer real choices when the lighting changes.
Grooming Tips for Professional Headshots and Full Sessions
Grooming tips for professional headshots come down to one principle: change nothing dramatic in the final week. Studio lighting and a sharp lens magnify texture, redness, and dryness that the human eye forgives in a mirror. The goal is to arrive looking like a well-rested, well-hydrated version of yourself, not a version of yourself mid-experiment.
The Seven-Day Grooming Timeline
Work backward from your shoot date. A repeatable schedule removes guesswork and prevents the last-minute panic that produces bad decisions.
- Day 7: Begin drinking water consistently, roughly half your body weight in ounces per day is a common target. Start moisturizing morning and night if you don’t already.
- Day 5 to 7: Get your haircut. A fresh cut needs several days to soften; a same-day trim reads as severe and angular on camera because the stylist’s lines haven’t relaxed yet.
- Day 3: Stop any new skincare product, exfoliant, or facial. A purge breakout from an untested active ingredient is the single most common last-minute problem photographers see.
- Day 2: Prioritize a full night of sleep. Under-eye darkness and puffiness show up in the final image more than almost any other variable, and one good night won’t undo a week of short ones.
- Day of: Shave or trim facial hair in the morning, not the night before, five o’clock shadow reads as uneven stubble under studio light. Bring a small comb and blotting papers.
Skin, Makeup, and Shine Control
Professional makeup for a shoot should be applied slightly heavier than daily wear, because studio lighting and camera sensors flatten contrast. Finish with translucent powder to control shine, forehead, nose, and chin are the three zones that catch specular highlights and blow out first. Bring the powder and a clean brush for touch-ups between wardrobe changes.
Anyone with facial hair should bring a comb and a small tin of balm; flyaway beard hairs catch rim light and look unkempt in ways that aren’t visible in a bathroom mirror. If you wear glasses, ask your photographer about anti-reflective coatings and whether they prefer you remove the lenses for a few frames, glare is a lens problem, not a face problem, and it’s easier to solve before the shoot than in retouching.
Bring your own makeup or grooming kit even if a stylist is provided. Familiar products match your everyday look, and a stylist working from your kit spends less time guessing your undertone.
What to Avoid in the Final 72 Hours
Skip alcohol and heavy sodium in the last three days; both promote puffiness that reads clearly on camera. Avoid facials, waxing, and brow shaping within 48 hours, redness and small bumps need time to settle. Don’t get a spray tan or try a new self-tanner for the first time before a shoot; uneven application is far more visible in a photograph than in person, and color correction for mismatched skin tone is one of the most time-consuming retouching tasks there is. Maintaining a consistent aesthetic extends beyond your complexion to the coordination of your group, where choosing matching outfits creates a cohesive visual narrative that complements your polished appearance.
Keep this schedule in your calendar and repeat it before every session. The subjects who look most consistent across years of headshots are the ones who treat grooming as a routine, not a scramble.
How to Pose for Professional Photos Without Looking Stiff
The trick to how to pose for professional photos is not memorizing poses; it is giving your body something natural to do. Stiffness comes from holding still and waiting for instruction. Motion fixes it. Shift weight onto your back foot, angle your shoulders slightly away from the lens, and turn your chin toward the light source. Then keep moving, a small sway, a hand adjusting a cuff, a slow turn of the head, so the photographer can catch you mid-gesture rather than mid-freeze.
A Posing Vocabulary You Can Actually Use
You don’t need to know pose names, but knowing what to ask for helps. Four reliable frames cover most sessions:
- The anchor: weight on the back foot, front foot slightly forward and turned out, shoulders angled 15-20 degrees off the lens axis.
- The lean: one forearm resting on a table, chair back, or wall, which gives the hands a purpose and drops the shoulders.
- The walk: a few steps toward or across the camera, which produces a natural stride and a relaxed face.
- The look-away: eyes off-camera toward a window or a person, which reads as candid and confident and avoids the deer-in-headlights stare.
If a pose feels awkward, it almost always looks awkward. Tell your photographer. A good one will change the setup rather than talk you into it.
Managing Camera Anxiety and Body Language
Camera anxiety is normal and nearly universal, even executives who speak to thousands of people freeze in front of a still lens.
Before the session:
During the session:
Do not over-rehearse your smile in a mirror. It produces a fixed expression that photographers call “the mask,” and it takes 20 minutes of conversation to undo.
The Imposter-Syndrome Problem
Anxiety on camera is a physical state, not a personality trait. Control your breath, give your hands a job, and keep your body in motion, the confidence in the final image is a byproduct of those three habits, not a prerequisite for them.
How Long Does a Professional Photoshoot Take?
| Session Type | Typical Duration | Best For |
|---|---|---|
| Single headshot | 15-30 minutes | Individual LinkedIn or bio photo |
| Full branding portrait | 1-3 hours | Executive personal brand, multiple looks |
| Team headshot day | 30-45 minutes per person | Department or company-wide refresh |
| Event coverage | 2-6 hours | Conferences, galas, board meetings |
Building a Mood Board and Creative Brief
A one-page brief with five reference images outperforms a 20-message text thread every time. Write it down before the shoot, not after.
What Happens After the Shoot: Retouching and Delivery
Post-shoot workflow is the step most guides skip.
Conclusion
The hardest part of a professional photoshoot is not the camera; it is the coordination of wardrobe, timing, grooming, and delivery around people who are already busy running an event.
Frequently Asked Questions
What should I avoid doing before a professional photoshoot?
Skip heavy drinking and salty foods the night before to prevent puffiness and tired eyes. Avoid trying a new haircut or facial within a week of your session, since a bad result leaves no time to fix it. Don’t wear tight clothing that leaves strap marks or red indentations on your skin. Also skip shiny makeup and busy patterns, which distract from your face. If you have a breakout, leave it alone rather than picking at it. Arrive with clean, moisturized skin and hair that’s easy to style.
How far in advance should I start preparing for a photoshoot?
Start about two weeks out. Schedule haircuts 7 to 10 days before so the cut settles naturally. Book any facial at least a week ahead to allow redness to fade. Build your mood board and confirm wardrobe choices 5 to 7 days prior. The night before, lay out your outfit, pack touch-up items, and get 7 to 8 hours of sleep. This timeline gives you room to adjust if something doesn’t work, without last-minute scrambling.
Can I wear glasses or jewelry in my professional headshot?
Yes, with a few adjustments. If you wear glasses daily, keep them on for authenticity, but ask your photographer about anti-glare coating or tilted lenses to reduce reflections. For jewelry, choose one statement piece rather than stacking multiple items. Small, simple earrings or a delicate necklace work well. Avoid anything that catches harsh light or casts shadows on your face. The goal is for accessories to complement your look, not compete with your expression.
How do I look more natural and confident in professional photos?
Practice a few poses in a mirror before the session so your body knows what feels right. During the shoot, shift your weight to one leg and angle your body slightly away from the camera, then turn your face back toward the lens. Breathe normally and take slow breaths between shots. Talk to your photographer about something you enjoy; genuine conversation produces genuine expressions. If you feel nervous, tell them. Experienced photographers guide you through poses and use techniques that ease camera anxiety.