Table of Contents
- Start With Event Objectives and Coverage Needs
- Venue Layout and Lighting Conditions in DC Spaces
- Event Photography Lighting Tips for Working With Available Light
- Low-Light Event Photography: When Supplemental Lighting Is Necessary
- Event Photography Flash Settings and Off-Camera Flash
- Indoor Event Photography Lighting Setup: Balancing Flash With Ambient Light
- Camera Settings, Exposure Trade-Offs, and Flash Etiquette
- Frequently Asked Questions
Last Updated: October 6, 2026
Start With Event Objectives and Coverage Needs
Event photography lighting requirements come down to one question: what must the final images do for you? A gala photo that lands on a donor thank-you card has different needs than a wide shot of a ballroom for a press release. This guide from Event Photojournalism explains how we plan lighting around your goals, and how you can brief any photographer the same way.
The planning step is where most events are won or lost. Before anyone touches a flash, define these three things:
- Event objectives, fundraising, media coverage, donor relations, or internal use
- Coverage needs, how many final images you need, and where they will run
- Must-capture moments, the award handoff, the keynote, the sponsor wall
Your audience matters too. Board members who avoid cameras need a different approach than a room full of guests dancing. Match the lighting plan to the people in the room, not just the room itself.
Venue Layout and Lighting Conditions in DC Spaces
Event spaces in the District fall into a handful of lighting archetypes, and each one changes how a photographer builds a plan. The categories below are not cosmetic, ceiling height, wall color, and existing color temperature each force a different decision about bounce surfaces, flash power, and lens choice.
- Historic ballrooms and hotel grand salons, Ceilings often run 20 to 40 feet, which puts a bounce flash out of reach. Warm chandeliers sit around 2700-3000K while the room’s ambient tungsten mixes with cooler stage wash, so a custom white balance or a gray-card frame at the start of the night saves hours in editing. Look for side walls, columns, or a balcony rail as a bounce surface instead of the ceiling.
- Hotel conference and breakout rooms, Low ceilings (8-10 feet) and flat overhead fluorescent or LED panels produce even but unflattering light. Bounce works well here, but the drop ceiling tiles absorb a stop or more of flash output, so plan on higher flash power or a faster recycle. Mixed color temperature between the ceiling panels and any stage wash is the most common color-cast problem.
- Museums and galleries, Ambient light is intentionally dim, and spotlit displays create extreme contrast between a lit object and a dark surround. Flash is frequently restricted near artwork, so the practical plan is a fast prime (f/1.4-f/1.8), ISO pushed to 3200-6400, and a shutter speed held at or above 1/125 to stop guest motion. Confirm restrictions with the venue’s events office in writing before the walkthrough.
- Rooftops, atriums, and glass-walled spaces, Natural light shifts dramatically between a 4 p.m. cocktail hour and a 7 p.m. program. A glass atrium at midday can be two to three stops brighter than the shaded interior, which forces a choice between blowing out the windows or silhouetting the subject. Scout at the actual event start time, not at noon.
Walk the venue before the event and check light at the start time, not at setup time. Note any venue requirements, many historic properties restrict flash, rigging, tape on floors, or stands in traffic paths for preservation and safety reasons. Ask specifically about: flash during speeches, stand placement, ceiling attachment points, and whether house lighting can be dimmed or raised on request.
A practical lighting map starts with four marks: the stage or podium, the registration or check-in table, the main guest circulation path, and the sponsor or step-and-repeat wall. For a broader look at how we plan coverage around venue constraints, see Event Photojournalism’s corporate event photography guide.
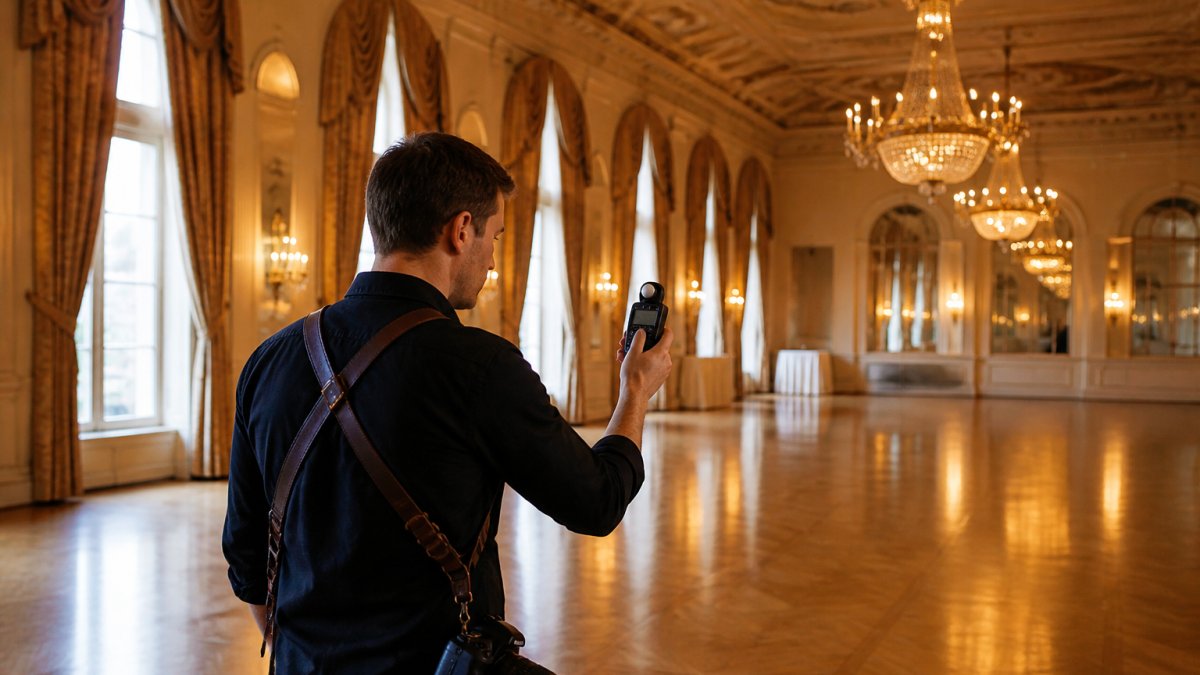
Ask the venue’s events contact for the house lighting plot and whether dimming is available. Knowing the existing color temperature and dimmer range before the walkthrough turns a guess into a plan.
Event Photography Lighting Tips for Working With Available Light
Available light is often the best light, if you know how to read it. Natural light near a window at golden hour flatters almost everyone. Midday sun through glass does the opposite, casting hard shadows and hot spots.
Here is how we work around tricky available light:
- Turn subjects toward the softest light source in the room
- Use window light as a key light and let shadows fall naturally
- Watch light direction, side light adds depth, backlight creates silhouettes
- Check light quality, soft light flatters, hard light exposes every flaw
Weather changes everything. An overcast day softens window light; a bright day turns a glass-walled atrium into a greenhouse. Plan a backup position for every setup.
Never place a speaker directly in front of a bright window. The camera exposes for the window, not the face, and you get a dark silhouette instead of a portrait.
Low-Light Event Photography: When Supplemental Lighting Is Necessary
Low-light event photography needs supplemental lighting when ambient light cannot support a clean exposure without blur or heavy noise. Reception halls, candlelit dinners, and evening award ceremonies usually cross that line.
Signs you need to add light:
- Shutter speeds drop below what handheld shooting can hold steady
- Guests and speakers blur when they move
- Images look grainy even at wide apertures
- Skin tones turn muddy under mixed color sources
The goal is not to flood the room. Add just enough light to hold detail in faces while keeping the room atmosphere intact. A single well-placed light often beats three poorly aimed ones.
For a full walkthrough of camera-side technique, see Event Photojournalism’s corporate event photography guide.
Event Photography Flash Settings and Off-Camera Flash
Event photography flash settings depend on distance, ceiling height, and whether you are bouncing or aiming light directly. On-camera flash aimed straight ahead flattens faces and creates harsh shadows. Off-camera flash gives you control over light direction and quality.
A simple starting point:
- Set the flash to manual and dial power to about one-quarter
- Bounce off a white ceiling or wall when the room allows it
- Move the flash off the camera for speaker photos and portraits
- Trigger a second light as a fill light to soften shadows
A lighting rig does not need to be complicated. One off-camera flash on a stand, aimed at a bounce surface, handles most indoor spaces. Add a second unit only when the room is large or the ceiling is too high to bounce.
| Scenario | Light Setup | Why It Works |
|---|---|---|
| Small reception room | One on-camera flash, bounced | Fast, mobile, soft enough |
| Large ballroom | Off-camera flash on stand | Reaches across the room |
| Speaker on stage | Off-camera flash, low power | Keeps stage lighting visible |
| Tight layouts | Bounce off side wall | Avoids crowding guests |
Indoor Event Photography Lighting Setup: Balancing Flash With Ambient Light
Indoor event photography lighting setup is really a balancing act between flash and ambient light. Set the flash too strong and the room disappears. Set it too weak and the background goes black.
Start by exposing for the room, then add flash to fill in faces. This keeps the stage lighting, candles, and decor visible while giving you clean skin tones. The light ratio between flash and ambient should stay low, so the two sources blend instead of competing. Maintaining this balance ensures that your stage and uplighting remain atmospheric, which is just as critical as managing the technical nuances of flawless audio for seamless events.
Expose for the room first, then add flash for the faces. That order keeps the atmosphere and the people in the same frame.
Camera Settings, Exposure Trade-Offs, and Flash Etiquette
Camera settings for event photography involve trade-offs you cannot avoid. You can raise ISO, open the aperture, or slow the shutter, and each choice costs you something. The trick is knowing which cost is acceptable for the moment you are shooting.
- Higher ISO, brighter image, more noise. Modern full-frame bodies hold up well to ISO 3200 and are usable at 6400 in a pinch; beyond that, noise reduction starts to smear skin texture.
- Wider aperture, more light, shallower depth of field. At f/1.4 on a 50mm, the plane of focus on a speaker’s face can be under an inch deep, so a slight lean puts the eyes out of focus.
- Slower shutter, more ambient light, more motion blur. Guests gesturing during a toast will blur below roughly 1/125; a speaker at a podium can often be held at 1/60 if they are still.
A common starting point for a dim reception is ISO 1600-3200, f/2.0-f/2.8, and 1/125, shot in RAW. RAW preserves highlight and shadow data so you can recover color casts from mixed lighting and pull back blown highlights from a stage wash. If you add flash, the flash freezes motion independently of shutter speed as long as you stay at or below the camera’s sync speed, typically 1/200 or 1/250 on most bodies. That is the mechanism that lets you keep a slow ambient shutter for atmosphere while still getting a sharp subject.
Expose for the room first, then add flash for the faces. If the ambient exposure is correct, the stage lighting, candles, and decor stay visible and the flash only fills in skin tones. Push flash power too high and the room goes black behind the subject; too low and faces go muddy.
Flash etiquette matters as much as settings, and it is where most event photographers get themselves removed from a room.
- Confirm flash rules with the venue and the event planner in advance, in writing if possible. Many performance spaces, museums, and houses of worship restrict flash outright.
- Never fire a direct flash into a speaker’s eyes mid-sentence. A low-power off-camera flash bounced off a side wall gives you light without a visible pop.
- During toasts, awards, and any moment with a videographer rolling, coordinate so your flash does not fire into their shot or trigger a slave unit.
- Watch for guests who flinch or turn away. If two or three people in a row react, drop flash power or switch to available light for that stretch of the room.
Organizations that need discreet coverage: a low-power off-camera flash bounced off a side wall, with no direct light on guests.
If you would rather hand this off, the U.S. Small Business Administration’s guidance on choosing professional services offers a useful framework for vetting vendors before you sign a contract.
Frequently Asked Questions
What lighting is best for event photography?
There is no single best lighting setup. The right approach depends on the venue and event type. For DC galas and conferences, photographers typically combine available ambient light with off-camera flash to keep the room atmosphere intact while ensuring subjects are properly exposed. Stage lighting and speaker photos often require higher ISO settings, while guest candid shots may need supplemental lighting. A professional assesses each space before deciding on a lighting approach.
How do photographers handle low-light event photography?
Low-light event photography requires a combination of techniques. Photographers raise ISO to 1600-3200 as stage lighting changes, use wide apertures, and add supplemental lighting where venue rules allow. RAW files preserve sensor data for post-processing recovery. The goal is capturing the room atmosphere without harsh flash overpowering the scene. Working around existing light sources rather than fighting them produces more natural results.
Do event photographers use flash at DC venues?
Yes, but with restrictions. Many DC venues, especially during keynote speeches or performances, prohibit flash to avoid distracting speakers and guests. Photographers must check venue requirements and event agendas in advance. When flash is permitted, off-camera flash bounced off ceilings or walls creates soft, flattering light. During sensitive moments, photographers rely on available light and higher ISO settings instead.
What camera settings work best for indoor event photography?
Indoor event photography settings vary by lighting conditions. A common starting point is ISO 1600-3200, aperture f/2.8 for shallow depth of field, and shutter speed of 1/125 to 1/250 for moving subjects. For speaker photos under stage lighting, spot metering on faces prevents blown highlights. RAW capture allows exposure adjustments in post. Photographers adjust these baseline settings as light quality and direction change throughout the event.
Lighting is the difference between photos you use and photos you delete. At Event Photojournalism, we plan every shoot around your event objectives, your venue’s lighting conditions, and the moments you cannot miss. Our award-winning team brings customized coverage, high-resolution delivery, and a discreet, photojournalistic approach to every gala, conference, and summit across the DMV area. Contact us to talk through your next event.