Last Updated: November 19, 2026
Quick Summary
Off-camera flash at events means firing one or more wirelessly triggered flash units away from the camera so light comes from an angle that shapes faces and separates guests from the background. Place the key light 45 degrees off the camera axis and slightly above eye level, then work in manual flash once the room is set. Gel every unit to the room’s dominant color temperature and test fire from the farthest corner before doors open.
- Mismatched trigger and receiver brands are the number one cause of missed pops.
- Set ISO, shutter speed and aperture for ambient light first, then dial flash power last.
- In a dark reception hall, start the key at about 1/4 power and the rim at 1/8.
- Two well-placed lights you can move in 90 seconds beat four lights you cannot reposition.
- If triggers fail mid-event, switch to on-camera flash with a bounce card and keep shooting.
Table of Contents
- Why Off-Camera Flash Beats On-Camera Light at Events
- Pairing Your Flash Trigger and Receiver for Reliable Firing
- Choosing Off-Camera Flash Modifiers for Crowded Rooms
- Balancing Ambient Light and Flash Without Killing the Room
- Building a Multiple Flash Setup for Events That Moves Fast
- Flash Placement, Angle, and Power Settings That Hold Up All Night
- Troubleshooting Mixed Color Temperatures and Missed Pops
- Book Off-Camera Flash Coverage for Your Next Gala
- Frequently Asked Questions
Why Off-Camera Flash Beats On-Camera Light at Events
On-camera flash flattens a room. Off-camera flash is the practice of firing one or more flash units away from the camera, triggered wirelessly, so light comes from an angle that shapes faces and separates guests from the background.
Here is the case in one line: on-camera light hits every subject from the same angle as your lens, so it kills depth. Move the light 45 degrees off-axis and faces gain dimension instantly.
Three more reasons it wins at events:
- Direction control. You decide where shadows fall, not the ceiling.
- Softer falloff. A light across the room wraps around a subject instead of blasting it.
- Room preservation. You can light a subject and still keep the venue’s ambient glow.
Before you fire anything at a formal event, read our guidance on how to use flash ethically at formal events so your lighting never disrupts a toast or a board meeting.
Pairing Your Flash Trigger and Receiver for Reliable Firing
Reliable firing starts with a matched trigger and receiver pair on the same radio system. A flash trigger is the transmitter on your camera hot shoe; the receiver sits under each off-camera flash unit and fires it when the trigger signals. Mismatched brands are the number one cause of missed pops.
Set these before the doors open:
- Match every unit to the same brand and radio protocol.
- Assign each light its own channel to avoid interference from other shooters.
- Group lights by job: group A for key, group B for rim, group C for background.
- Test fire from the farthest corner of the room.
- Carry spare batteries for every transceiver.
Watch out: a trigger that fires fine up close can fail across a large hall. Test at maximum distance, not from two feet away.
Choosing Off-Camera Flash Modifiers for Crowded Rooms
Crowded rooms punish big modifiers. A light modifier shapes and softens the raw beam from a flash unit, and in a packed gala the wrong one either knocks over a centerpiece or throws a hard, unflattering edge. For tight spaces, small softboxes and collapsible umbrellas win.
Here is how we sort them by situation:
| Modifier | Best For | Trade-off |
|---|---|---|
| Small softbox | Portraits in tight corners | Less spread across a group |
| Shoot-through umbrella | Fast group shots | Takes floor space |
| Bounce card | Run-and-gun candids | Depends on ceiling height |
| Bare speedlight with grid | Background accents | Hard light on faces |
For gala work specifically, our breakdown of lighting equipment for indoor charity gala photography covers which modifiers survive a room full of round tables.
A common mistake is defaulting to a huge umbrella because it softens beautifully. In a crowded room it becomes a liability. Match the modifier to the floor plan, not the ideal studio setup.
Balancing Ambient Light and Flash Without Killing the Room
Balancing ambient light and flash means setting your exposure so the room’s existing light still reads, then adding just enough flash to lift your subject. Kill the ambient and the venue looks like a cave. Overpower the flash and guests squint.
The sequence that works:
- Set ISO to a level that keeps the room’s glow visible.
- Choose a shutter speed that holds the ambient exposure. Slower speeds pull in more room light.
- Set aperture for the depth of field you want.
- Dial flash power last, just until the subject is lit correctly.
This is flash-to-ambient balance in practice. Nail the ambient first, then add flash as seasoning. Venue rules and room constraints shape how far you can push this, and our guide to DC event photography lighting requirements explains the local limits that affect the balance.
Building a Multiple Flash Setup for Events That Moves Fast
A multiple flash setup for events is a lighting plan where two or more off-camera units divide the work: one key light on the subject, one rim or background light for depth.
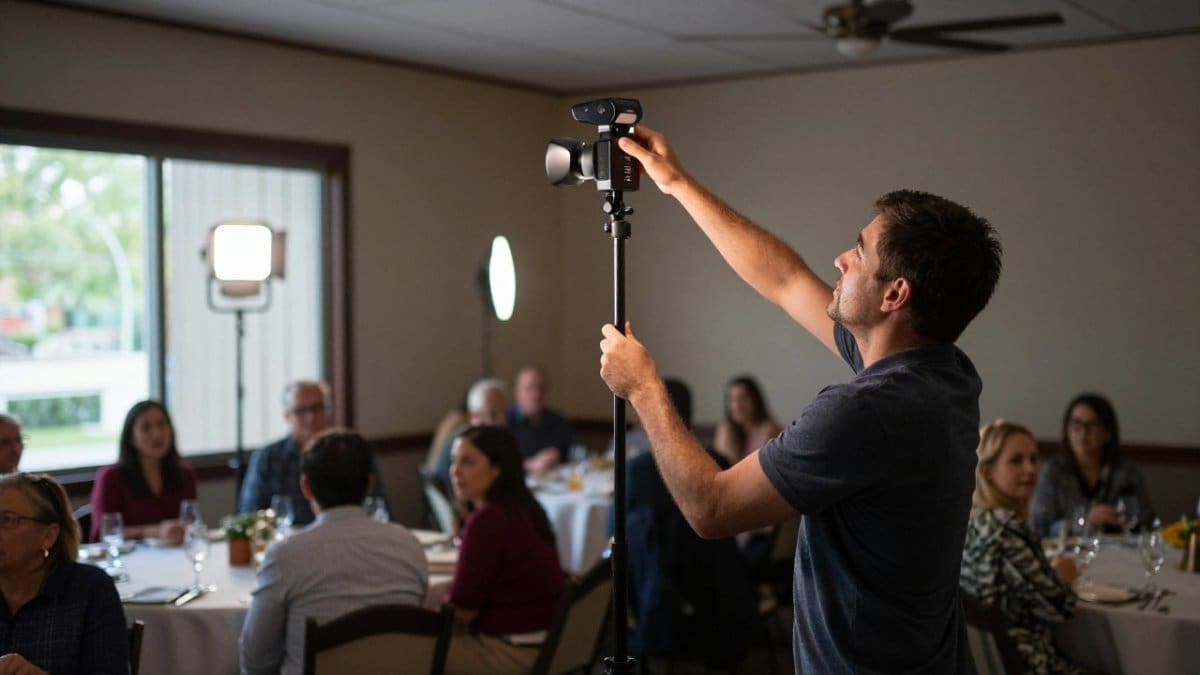
A reception hall, an outdoor ceremony, a mixed-light ballroom, and a crowded dance floor each call for a different plan. Here are four adaptable setups you can scout and rebuild on site.
Dark reception hall. Place the key light 45 degrees off the camera axis and slightly above eye level, about 8 to 10 feet from your subject path. Put a rim light behind and opposite the key at roughly the same height, aimed back toward the camera. Set the key to about 1/4 power and the rim to 1/8 power as a starting point, then tune. Keep the ambient exposure visible so the room still reads.
Outdoor ceremony at dusk. Use one bare speedlight on a stand as a fill at camera left, feathered so it grazes the couple rather than blasting them. Add a second unit behind the officiant as a subtle separation light.
Mixed-light ballroom. Gel every unit to the dominant room temperature, often tungsten chandeliers, and set white balance to that room, not to daylight.
Crowded dance floor. Go small: two speedlights on lightweight stands with small softboxes or grids, sandbagged and tucked against walls or columns out of guest traffic. Keep the key low and close for soft falloff, and use the second light as a backlight to separate dancers from the crowd.
Speed matters more than perfection at a live event. Build a repeatable kit and a repeatable sequence:
- Scout the room before doors open and pick two stand positions per zone.
- Pre-clamp stands to marked heights so rebuilds are identical.
- Test fire from the farthest corner and confirm every group fires.
- Meter ambient, set exposure, then dial flash power per group.
- Tape cords, sandbag bases, and keep stands out of walkways.
A common pattern is to overbuild the first setup and then have no time to rebuild when the room changes. Two well-placed lights you can move in 90 seconds beat four lights you cannot reposition.
Flash Placement, Angle, and Power Settings That Hold Up All Night
Placement decides the look before power ever matters. Put the key light 45 degrees off the camera axis and slightly above eye level, and faces gain shape. Raise it too high and you get raccoon shadows; drop it too low and the light turns theatrical.
For power, work in manual flash once the room is set. TTL is fast but drifts as guests move between light and lens. Manual holds steady all night.
Settings that travel well:
- Aperture: fixed for consistent depth.
- Shutter speed: enough to freeze motion without losing ambient.
- ISO: locked once the room is metered.
- Flash power: tuned per lighting group, not per shot.
For candid work, our notes on the best camera settings for candid event photography pair well with these placement choices.
Troubleshooting Mixed Color Temperatures and Missed Pops
Mixed color temperature is the silent killer of event photos. Your flash fires at daylight white balance while the room glows warm from tungsten chandeliers, and suddenly faces are blue against orange walls. The fix is gel your flash to match the room, then set white balance to the room, not to daylight.
A practical sequence for mixed-light rooms:
- Meter the ambient light on a neutral surface and note the color cast.
- Choose a gel that matches the dominant room temperature, full CTO for tungsten, a lighter straw for warm LED, and fit it to every unit in the setup.
- Set white balance to the room temperature, not to daylight, so skin tones stay consistent across a sequence.
- Test fire and check a frame before the room fills.
- Re-check when the venue changes lighting between dinner and dancing.
Watch out: gelling only the key light and leaving the rim light bare creates two color casts on one face. Gel every unit in the setup to the same room temperature.
Missed pops have a shorter list of causes, but each needs a mechanism and a fix:
- Dead or mismatched batteries in a receiver. Swap batteries in every transceiver before doors open and carry spares; a receiver that fires up close can fail across a large hall.
- A channel collision with another photographer. Assign each light its own channel and confirm no other shooter in the room is on it.
- A trigger pushed past its reliable range. Test fire from the farthest corner, not from two feet away, and note the failure distance.
- A receiver that slipped off its hot shoe. Check seating on every unit after each move.
- Radio interference or line-of-sight loss. Radio beats optical in a crowded ballroom, but walls and bodies still attenuate signal; keep the trigger high and the receivers clear of metal.
- Recycle delays. A speedlight that has not recycled will not fire; reduce power or add a second unit rather than waiting.
Have a contingency plan ready before the event. If triggers fail mid-event, switch to on-camera flash with a bounce card or available light and keep shooting, a missed pop is recoverable, a missed moment is not. A fast, repeatable workflow beats a perfect one you can’t rebuild. Test fire, check color, move on.
Book Off-Camera Flash Coverage for Your Next Gala
Executing these techniques under event pressure, while also reading the room, tracking VIPs, and staying invisible, is a full-time job. Event Photojournalism provides high-resolution coverage across the DMV area from our Washington DC and Northern Virginia locations, with customized solutions built around your gala, conference, or summit.
If you want gear-informed coverage for a low-light event, explore our gala photography coverage options.
Your next gala deserves lighting that makes every frame usable for the annual report and the morning press release. Event Photojournalism delivers award-winning photography, customized solutions, and reliable, expert coverage that turns your event into lasting visual assets. Get started with Event Photojournalism and capture your event the way it actually felt.
Frequently Asked Questions
Why is off-camera flash better for event photography?
On-camera flash fires straight at your subject, which flattens faces and throws a hard shadow behind them. Off-camera flash lets you set the light at an angle, so faces get shape and the shadow falls out of frame. The tradeoff is more gear and setup time, which is why a repeatable trigger and receiver routine matters.
How do you balance ambient light and flash at an event?
Set your exposure for the room first, then add flash. Choose a shutter speed that keeps the background bright enough, an aperture that holds the depth of field you need, and an ISO that lets the ambient light register. Then dial flash power down until it fills faces without overpowering the room. In a ballroom with warm chandeliers, underexposing the ambient by roughly one stop and letting flash carry the subject keeps the room’s character while keeping skin tones clean.
How do you trigger off-camera flash reliably during an event?
Use radio triggers rather than optical slaves. Set every flash and trigger to the same channel, and give each light its own group so you can adjust power from the camera. Before the room fills, test fire from the farthest corner you plan to shoot from. Carry spare batteries for both the trigger and receiver, and tape down light stands so a bumped stand does not take a flash out of the night.
How do you use multiple off-camera flashes without making event photos look harsh?
Start with one light and add only when you need it. A two-light setup, one key light at roughly 45 degrees and one rim or background light, covers most ballroom work. Keep the key light modified with a softbox or umbrella to soften the falloff, and set the second light a stop or two lower so it separates the subject without competing. Keep flash power low and let the ambient light do more of the work, which keeps skin tones natural and shadows soft.