Table of Contents
- What Event Photography Actually Demands (And What Most Guides Skip)
- Event Photography Gear List: What to Pack for Every Shoot
- Event Photography Camera Settings for Any Lighting Condition
- Pre-Event Preparation: Building Your Shot List and Event Brief
- Capturing Candid Moments and Documentary-Style Coverage
- How to Price Event Photography: Rates, Packages, and Value
- Event Photography Contract Template: Legal and Liability Essentials
- Post-Processing, Workflow Automation, and Client Delivery
- Networking and Marketing to Grow Your Event Photography Business
- Conclusion
Last Updated: May 25, 2026
Professional event photography is one of the most technically demanding disciplines in commercial photography, yet most guides treat it like a checklist of camera settings and call it a day. At Event Photojournalism, we’ve covered hundreds of corporate conferences, galas, and weddings across the DMV area, and the difference between forgettable coverage and award-winning imagery almost never comes down to gear. It comes down to preparation, systems, and knowing exactly what to do when the light fails, the timeline shifts, or the client changes the brief at the last minute. Below, we’ll show you exactly how professionals approach every stage of an event shoot, from packing the gear bag to delivering polished final images, including the legal and workflow angles that most guides skip entirely.
What Event Photography Actually Demands (And What Most Guides Skip)
Event photography is the practice of documenting live, unscripted occasions, ranging from corporate conferences and galas to weddings and private celebrations, with the goal of producing images that capture both the factual record and the emotional truth of the event.
Here’s what most guides get wrong: they treat event coverage as a purely technical problem. Nail your ISO settings, bring a fast prime lens, and you’re set. That framing misses the hardest part entirely.
The real challenge is operating as a visual journalist under real-time pressure. You’re managing client expectations, reading a room full of strangers, anticipating moments that haven’t happened yet, and making dozens of exposure decisions per minute, all while staying invisible enough that people forget you’re there.
Documentary-style event coverage demands a specific mental model. You’re not a portrait photographer who controls the environment. You’re not a landscape photographer who can wait for the light. You’re a photojournalist with a commercial brief, and that tension between artistic instinct and client deliverables is what separates competent shooters from exceptional ones.
The other thing nobody tells you: the business side of event photography is just as demanding as the technical side. Contracts, pricing, workflow automation, and on-site backup strategies are the unsexy infrastructure that keeps a professional practice running. We cover all of it below.
Event Photography Gear List: What to Pack for Every Shoot
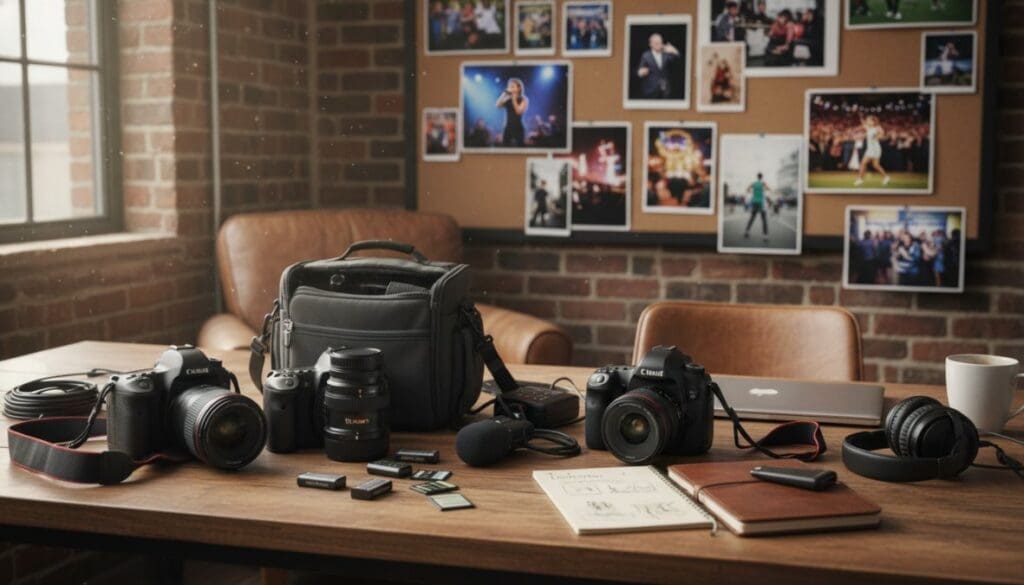
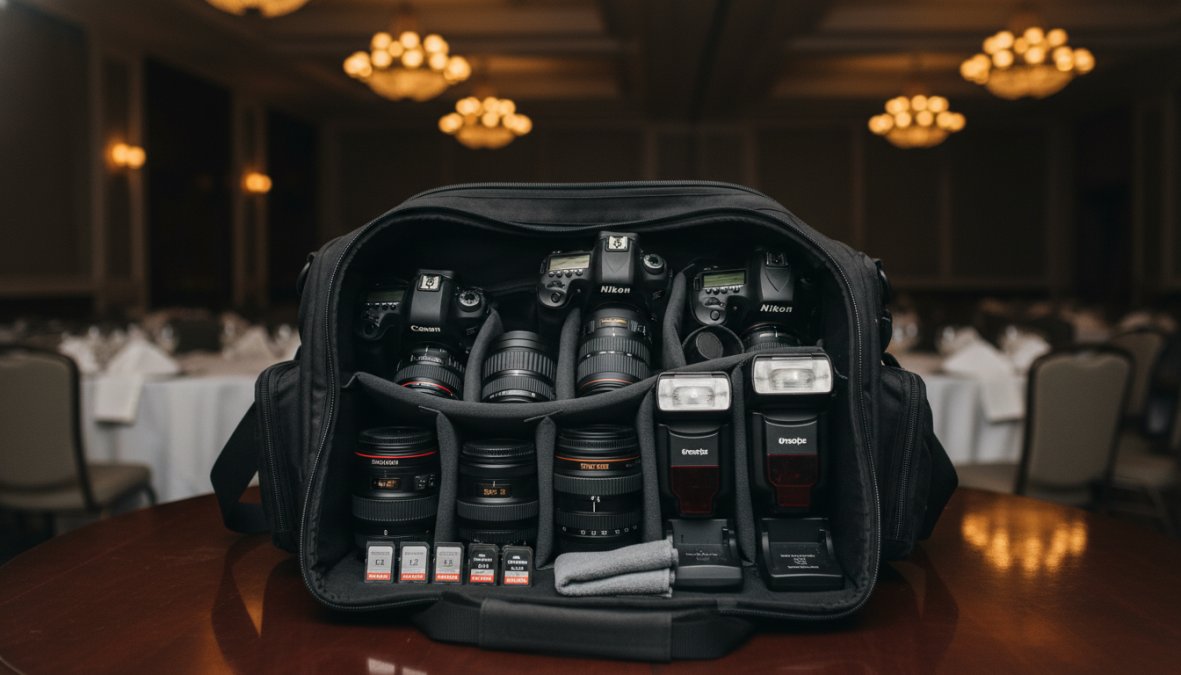
A professional gear bag for event work is built around redundancy, not maximalism. The goal isn’t to bring everything you own. The goal is to ensure that no single point of failure can ruin a client’s event coverage.
(/photography-services-complete-buyers-guide/) Gear List: What to Pack for Every Shoot]
Primary Camera Bodies and Prime Lenses
Bring two camera bodies, minimum. This is non-negotiable for any professional booking. If your primary body fails mid-event, you cannot ask the keynote speaker to repeat their remarks.
For lens selection, prime lenses outperform zooms in low-light event environments because of their wider maximum apertures. A 35mm f/1.8 and an 85mm f/1.8 cover most event scenarios, from wide environmental shots to tight candid portraits. Many working event photographers add a 24-70mm f/2.8 zoom as a versatile middle option for fast-moving coverage where switching lenses isn’t practical.
Key gear list for a standard event shoot:
- Two full-frame or APS-C mirrorless or DSLR bodies with charged batteries (bring spares)
- 35mm f/1.8 or f/1.4 prime for environmental and group shots
- 85mm f/1.8 prime for portraits and candid moments
- 24-70mm f/2.8 zoom for flexible coverage
- Lens cleaning cloth and blower
Flash Photography and Lighting Accessories
Flash photography at events is a skill most photographers underinvest in. A single on-camera speedlight with a bounce card or small diffuser transforms flat, harsh flash into soft directional light that reads as natural. For larger venues, consider a second speedlight with a wireless trigger for off-camera fill.
White balance becomes critical when mixing flash with ambient venue lighting. Shooting in RAW files gives you full post-production flexibility to correct color casts that mixed lighting creates.
On-Site Backup Strategies: Memory Cards and Redundancy
This is the part most event photography guides skip. Memory card failure is rare but catastrophic when it happens at a client’s wedding or corporate gala.
The professional standard is dual-slot recording: both card slots in your camera write simultaneously, so every image exists on two cards the moment you take it. If you’re shooting with a single-slot body, transfer cards to a portable SSD drive during any natural break in coverage.
Never reformat or delete cards from an event until you’ve confirmed the full delivery to the client. Many photographers have lost irreplaceable images by clearing cards before verifying the backup copy.
Carry at least four high-speed memory cards with enough capacity for the full event. Label them with a marker so you can track which are full and which are empty during fast-moving coverage.
Event Photography Camera Settings for Any Lighting Condition
Getting your camera settings right before the event starts is the difference between a confident shoot and a night spent rescuing underexposed RAW files in post. The right baseline settings vary by venue, but the framework stays consistent.
Shutter Speed, Aperture, and ISO Settings Explained
For event photography, shutter speed controls motion blur, aperture controls depth of field and light intake, and ISO settings control sensor sensitivity at the cost of noise. The practical starting point for most indoor events:
- Shutter speed: 1/160s minimum to freeze natural movement; 1/250s or faster for dancing or active presentations
- Aperture: f/2.0 to f/2.8 for low-light performance while maintaining enough depth of field for groups
- ISO settings: start at ISO 1600 for moderately lit venues; push to ISO 3200 or 6400 on cameras with strong low-light performance
Modern mirrorless systems handle high ISO settings with significantly less noise than bodies from five years ago, which has fundamentally changed how event photographers approach dark reception halls and conference rooms with mixed lighting.
White Balance and RAW Files for Post-Production Flexibility
Set white balance to Auto when shooting mixed lighting environments. It won’t be perfect, but it gives you a usable starting point in post-production. The real insurance policy is shooting RAW files exclusively.
RAW files preserve the full sensor data, which means white balance, exposure, and color grading decisions are fully reversible in post. JPEG files bake those decisions in permanently. For event coverage where you’re moving through five different lighting environments in a single hour, RAW is not optional for professional work.
Set a custom Picture Profile in-camera that slightly underexposes by 1/3 stop. Recovering highlights in RAW files is far easier than recovering blown-out whites on a speaker’s shirt or a wedding dress.
Pre-Event Preparation: Building Your Shot List and Event Brief
Most event coverage problems are actually preparation failures in disguise. The shoot itself rarely surprises experienced photographers. The surprises happen when you show up without a clear event brief.
An event brief is a document you build with the client before the shoot that covers the event timeline, key people to photograph, specific moments that are non-negotiable, venue layout, and any restrictions on photography (common at corporate events with sensitive materials on screens). According to Professional Photographers of America’s business resources, establishing clear deliverables and expectations before the event is one of the most consistent factors separating profitable event photographers from those who struggle with client satisfaction.
Build your shot list from the event brief. A standard corporate event shot list includes:
- Venue exterior and interior establishing shots before guests arrive
- Registration and arrival candids
- Speaker portraits and podium shots
- Audience reaction shots during presentations
- Networking and interaction candids
- Award presentations or ceremonial moments
- Group photos (confirm exact groupings in advance)
- Detail shots: signage, branded materials, table settings
- Closing/departure moments
Arrive at the venue at least 45 minutes before guests arrive. Walk the space, identify the worst lighting zones, and plan your flash or ISO strategy for each area. The event timeline should be in your pocket, not your camera bag.
Capturing Candid Moments and Documentary-Style Coverage
Candid photography is the hardest skill to teach because it’s fundamentally about human behavior, not camera technique. The technical side is straightforward: use a longer focal length to create distance, keep your shutter speed fast enough to freeze natural movement, and shoot continuously during peak moments.
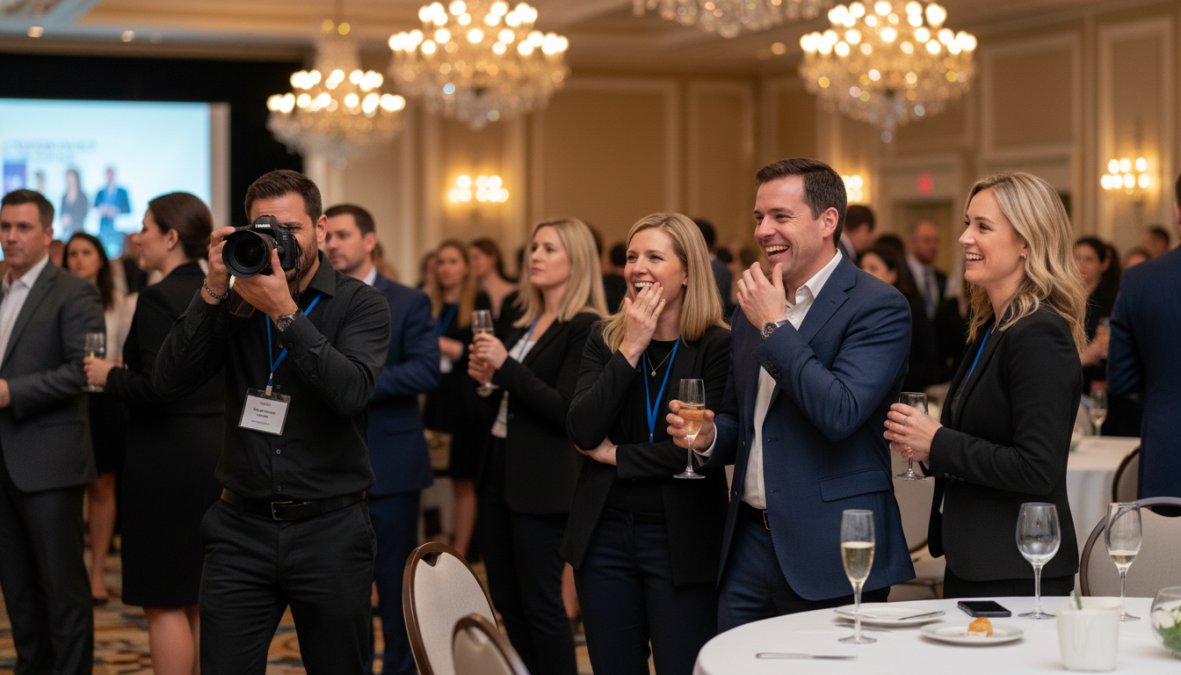
The harder skill is becoming invisible. Guests who notice the camera change their behavior. The candid moment dies the second someone spots the lens and straightens up. Experienced event photographers use several techniques to stay unnoticed:
- Move during applause or music, when attention is elsewhere
- Keep the camera at eye level and move confidently, like you belong
- Avoid making eye contact with subjects you’re about to photograph
- Use a 85mm or longer lens to shoot from across the room
- Dress to match the event’s dress code exactly
Documentary-style coverage means capturing the event as it actually happened, not as a series of posed portraits. The most valuable images from any event are usually the unguarded moments: the speaker laughing with an attendee, the CEO’s genuine reaction to an award, the friends reconnecting at a reunion. Those images cannot be staged. They can only be anticipated.
How to Price Event Photography: Rates, Packages, and Value
Pricing event photography is where many talented photographers undercut themselves, and it’s almost always because they’re pricing their time rather than their value.
The practical framework for event photography pricing has three components: your time (shooting hours plus travel plus editing hours), your overhead (gear maintenance, insurance, software subscriptions), and your market position (what clients in your area pay for comparable coverage quality). As a reference point, the Bureau of Labor Statistics Occupational Outlook for photographers provides baseline earnings data that helps contextualize professional photography rates against market expectations.
A common structure for event photography packages:
| Package | Coverage Hours | Deliverables | Best For |
|---|---|---|---|
| Essential | 2-3 hours | 100-150 edited images | Small corporate events |
| Standard | 4-6 hours | 250-400 edited images | Conferences, galas |
| Full Day | 8-10 hours | 500+ edited images | Weddings, multi-session events |
| Multi-Photographer | Custom | Custom | Large-scale events |
The thing nobody tells you about event photography pricing: clients rarely push back on rates when the value is clearly articulated. The problem isn’t that your rates are too high. The problem is usually that your proposal doesn’t connect the deliverables to the client’s actual business goals. Corporate clients aren’t buying photographs. They’re buying brand assets, internal communications material, and social media content. Frame your pricing accordingly.
Event Photography Contract Template: Legal and Liability Essentials
A contract is not a sign of distrust. It’s the document that protects both you and the client when something goes wrong, and in event photography, something always eventually goes wrong. Most event photography guides cover the basics, scope, deliverables, payment terms, and stop there. This section goes further, covering the legal and liability elements that most photographers only discover they needed after a dispute.
Core Contract Clauses Every Event Photography Agreement Needs
- Scope of work: Specific event date, location, coverage hours, number of photographers, and any second-shooter arrangements
- Deliverables: Number of edited images, file format (high-resolution JPEGs; RAW files only if explicitly included and priced), delivery timeline, and the platform through which images will be delivered
- Payment terms: Non-refundable deposit amount (typically 25-50% of the total fee), final payment due date, accepted payment methods, and late payment fees
- Cancellation and postponement policy: Client cancellation fees on a sliding scale based on notice period (many photographers use a structure where cancellations within 30 days of the event forfeit the full deposit; cancellations within 7 days forfeit the full fee); your own cancellation policy if you are incapacitated, including whether you will provide a qualified substitute photographer
- Image rights and licensing: Who owns the images, what the client is licensed to use them for, whether you retain the right to use images in your portfolio and marketing materials, and the terms under which a full rights buyout is available (and at what additional cost)
Model Releases: When You Need Them and When You Don’t
This is the clause most event photography contracts omit entirely, and it’s the one most likely to create a legal problem.
The general legal principle in most U.S. jurisdictions: photographing people in a public or semi-public setting (a conference hall, a gala, a festival) for editorial or documentary purposes does not require individual model releases. However, using those images for commercial advertising, including in your own promotional materials, typically does require a release from identifiable individuals.
Practical implications for event photographers:
- Portfolio and website use: If you want to use event images on your website or in marketing materials, your contract with the client should grant you that right, and ideally the client’s event registration or ticketing process should include a photography consent notice to attendees. Many corporate clients handle this through their own event registration terms.
- Corporate clients who want to use images in advertising: If a corporate client intends to use event images in paid advertising (not just internal communications or editorial press releases), they are responsible for obtaining model releases from identifiable individuals. Your contract should state this explicitly and clarify that the responsibility lies with the client, not with you.
- Private events (weddings, private parties): For private events, a clause in your contract granting you portfolio use rights, with the client’s acknowledgment, is standard practice. If the client requires that no images be used publicly, that restriction should be documented and reflected in your pricing.
For photographers working across state lines or internationally, model release requirements vary by jurisdiction. The American Society of Media Photographers publishes guidance on this topic that is worth reviewing as a reference point: ASMP model release guidance and legal resources
Liability Limitation and Indemnification
Your contract must include a limitation of liability clause. Without one, your theoretical exposure in the event of equipment failure, missed coverage, or data loss is uncapped.
A standard limitation of liability clause for event photography limits your maximum liability to the total fee paid by the client for the specific event. This means that if your primary card fails and you lose coverage of a keynote speech, the client’s recourse is a refund of the fee, not a claim for consequential damages (the cost of re-staging the event, lost business value, etc.).
The indemnification clause works in the other direction: the client agrees to indemnify you against claims arising from their use of the images beyond the licensed scope. If a client uses your event images in a way that generates a third-party claim (a speaker objects to their image being used in advertising without consent), the client bears that liability, not you.
Limitation of liability clauses are enforceable in most U.S. jurisdictions but are subject to state-specific rules. Have a contracts attorney review your template before you use it commercially. A one-time legal review of a standard template is a fixed cost that protects every booking you take afterward.
Event Photography Insurance: What Coverage You Actually Need
This is the other element most event photography guides skip. Professional liability insurance (also called errors and omissions insurance) and general liability insurance are not optional for working event photographers, they are frequently required by corporate clients and venues before you’re permitted on-site.
- General liability insurance: Covers third-party bodily injury or property damage claims arising from your presence at an event. A standard policy with a $1 million per-occurrence limit is the minimum most corporate venues and event planners require. Many photographers obtain this through organizations like the Professional Photographers of America, which offers member access to group liability policies.
- Professional liability (errors and omissions) insurance: Covers claims arising from your professional services, for example, a client claiming that your coverage failed to meet the contracted standard. This is separate from general liability and specifically relevant to photography services.
- Equipment insurance: Covers your gear against theft, damage, and loss. Standard homeowner’s or renter’s insurance policies typically exclude professional equipment used for commercial purposes. A dedicated inland marine or camera equipment policy covers your gear at replacement value.
- Additional insured requests: Corporate clients and venues frequently ask to be named as an additional insured on your general liability policy for the duration of the event. Your insurance provider can issue a certificate of additional insured status, usually at no additional cost. Build the turnaround time for this certificate into your pre-event preparation checklist.
Subcontractor and Second-Shooter Clauses
If you bring a second shooter or assistant to an event, your contract should address this explicitly. Key points:
- Confirm whether the client has approved a second photographer (some corporate clients have security or confidentiality requirements that restrict additional personnel)
- Clarify that images captured by a second shooter are delivered as part of your contracted deliverables and are subject to the same usage rights and licensing terms
- If your second shooter is an independent contractor rather than an employee, ensure your own contract with them assigns image rights to you for the purposes of client delivery
Never start shooting an event without a signed contract and a deposit in hand. Verbal agreements are unenforceable in most jurisdictions, and a client who won’t sign a straightforward contract is a client who will dispute your invoice. Keep signed contracts and proof of deposit for a minimum of three years after the event date.
Post-Processing, Workflow Automation, and Client Delivery
The shoot ends when you leave the venue. The work doesn’t. Post-processing a full corporate event or wedding can easily run 8-15 hours if you’re editing image by image without a system. The photographers who stay profitable at volume are not faster editors, they have a smarter pipeline. This section breaks down the full professional workflow, including the automation tools that most guides never mention.
Stage 1: Ingest and Immediate Backup
The moment you return from an event, your first action is ingest and redundant backup, before you open a single image to review. Copy all RAW files to your primary working drive and simultaneously to a second external drive. Many working photographers add a third copy to a cloud backup service (Backblaze B2 is a common choice for its low per-gigabyte cost) running overnight. The rule used by most professional event photographers: a file does not exist unless it exists in at least two physical locations and one off-site location.
Name your folders with a consistent convention from day one. A format like YYYYMMDD_ClientName_EventType keeps years of archives searchable without relying on memory.
Stage 2: Culling with Photo Mechanic
Do not cull in Lightroom or Capture One. This is the single most impactful workflow change most event photographers can make. Lightroom renders full previews from RAW files during culling, which is slow. Photo Mechanic reads embedded JPEG previews instead, making it possible to move through hundreds of frames in a fraction of the time.
The practical culling workflow in Photo Mechanic:
- Open the ingested folder and set the viewer to 100% zoom on the focus point
- Use a single key (most photographers use the number
1or the color tag system) to mark selects on the first pass, move fast, trust your instincts - On the second pass, filter to selects only and cut aggressively: duplicate expressions, near-identical compositions, and any frame where focus missed
- Target a cull rate of roughly 10-15% of total frames shot for a standard event; a 2,000-frame shoot should yield 200-300 selects
- Export selects directly from Photo Mechanic into a Lightroom catalog using the "Ingest" function, which embeds your metadata and keywords before Lightroom ever opens
This two-pass cull in Photo Mechanic typically takes 20-40 minutes for a full event, compared to 2-3 hours doing the same work inside Lightroom.
Stage 3: Batch Editing in Lightroom or Capture One
Once your selects are in your editing application, the goal is to minimize per-image decisions. The professional approach:
- Sync a base correction across lighting groups. Sort your selects by the lighting environment they were shot in (main ballroom, registration area, outdoor terrace). Apply a single exposure, white balance, and color grade correction to the best-exposed frame in each group, then sync that correction to all images from the same environment. This eliminates redundant decisions.
- Use venue-specific presets. If you shoot the same hotel ballroom or conference center repeatedly, build and save a Lightroom preset calibrated for that venue’s specific lighting. A venue preset eliminates the base correction step entirely on return visits.
- Reserve individual adjustments for hero images only. Keynote speaker portraits, award presentations, and the client’s requested key moments deserve individual attention. Networking candids and establishing shots do not.
Stage 4: AI-Assisted Editing for High-Volume Work
This is the part of the workflow that most event photography guides published before 2024 miss entirely. AI-powered editing tools have materially changed what’s possible at volume.
- Lightroom’s AI Masking (Subject Select and Sky Select) automates the most time-consuming manual masking tasks, separating a speaker from a dark background for a targeted exposure lift now takes one click instead of five minutes
- Lightroom’s Denoise AI processes high-ISO RAW files (ISO 3200-12800) to a quality level that previously required significant manual noise reduction work, and it runs as a batch process
- Aftershoot and Imagen AI are dedicated AI culling and editing applications that learn your personal editing style from your Lightroom history and apply it automatically to new imports, most photographers who use them report cutting editing time by 50-70% on standard event coverage after a training period of several hundred images
The trade-off with AI editing tools is consistency versus control. AI-applied edits require a quality-check pass before delivery, particularly on images with unusual lighting or skin tones. Build that review step into your timeline rather than skipping it.
Stage 5: Export and Client Delivery
Export settings for standard event delivery: high-resolution JPEGs at 100% quality, sRGB color space, with long edge at full resolution (not resized). Include your copyright metadata in the export settings. Create a separate web-resolution export folder (long edge 2048px) for clients who need images for social media immediately.
For client gallery delivery, Pixieset and Shootproof are the two platforms most widely used by professional event photographers. Both offer:
- Password-protected galleries with expiry dates
- Client-selectable favorites and download options
- Integrated print sales if relevant
- Mobile-friendly delivery that corporate clients can access immediately
Set your gallery expiry date in the contract, 90 days is a common standard, and communicate it clearly in your delivery email. After expiry, the images live in your archive, not on a platform you’re paying to host indefinitely.
Create a delivery email template that includes: the gallery link and password, the download instructions, the expiry date, the licensed usage rights (per your contract), and a one-line request for a Google or LinkedIn review. Sending this template consistently takes 90 seconds and compounds into a review profile that drives future bookings.
Do not delete your RAW files until at least 90 days after client delivery is confirmed. Storage is inexpensive. Recreating images from a corrupted or accidentally deleted delivery folder is impossible.
Set clear delivery timelines in your contract, 5-7 business days for corporate events and 3-4 weeks for weddings are common professional standards, and communicate proactively if you’re running behind. Corporate clients frequently have internal deadlines for using event images in newsletters, press releases, and social media, and missing a delivery window is one of the most common reasons a satisfied client doesn’t rebook.
Networking and Marketing to Grow Your Event Photography Business
The best event photographers in any market get most of their work through referrals. That’s not an accident. It’s the result of a deliberate approach to relationship-building that most photographers treat as optional.
The most productive networking for event photographers happens at the events themselves. Venue coordinators, event planners, AV companies, and catering managers all work with the same client base you do. A venue coordinator who recommends you to three event planners is worth more than any advertising spend.
Practical marketing strategies that actually generate event photography bookings:
- Build a venue portfolio: Shoot a styled shoot or offer discounted coverage at a new venue in exchange for being on their preferred vendor list
- Target corporate communications teams: LinkedIn outreach to internal communications and marketing managers at companies in your area is more direct than general advertising
- Document your process publicly: Behind-the-scenes content showing your preparation, gear, and on-site workflow builds credibility with clients who’ve never hired a photographer before
- Collect and publish testimonials: Corporate clients research vendors carefully. A portfolio of named client testimonials from recognizable companies carries significant weight
According to the Digital Photography School’s business growth resources, referral-based marketing consistently outperforms paid advertising for event photographers because the trust transfer from a known contact reduces the sales cycle significantly.
The marketing angle most event photographers miss entirely: your existing clients are your best sales channel. A simple follow-up email after delivery asking for a referral or a Google review costs nothing and compounds over time.
Professional event photography demands technical skill, business systems, and the kind of preparation that makes the shoot itself look effortless. If you’re planning a corporate conference, gala, or special occasion in the DMV area and need coverage that goes beyond documentation to deliver genuine brand assets, Event Photojournalism brings award-winning photography, high-resolution image delivery, and customized solutions built around your specific event goals. CONTACT US to discuss your upcoming event and how our team can transform it into lasting visual assets.
Frequently Asked Questions
What is included in event photography coverage?
Event photography typically includes pre-event consultation, on-site shooting of key moments such as arrivals, speeches, candid interactions, and posed portraits, plus post-production editing and high-resolution image delivery. Professional event photographers also provide an event brief review, a shot list, and, depending on the package, same-day previews or batch-edited galleries. Corporate events, galas, and weddings may also include documentary-style coverage that tells the full story of the occasion.
What are the best camera settings for event photography?
For most event photography scenarios, start with a shutter speed of at least 1/100s to freeze motion, a wide aperture between f/1.8 and f/2.8 for low light performance, and auto ISO capped around 6400. In darker venues, bump ISO higher and rely on flash photography or fast prime lenses. Always shoot RAW files to maximize white balance flexibility during post-production. Adjust these event photography camera settings dynamically as lighting conditions change throughout the event timeline.
How much should I charge for event photography?
Pricing event photography depends on event type, duration, deliverables, and your market. Common approaches include hourly rates, half-day or full-day flat fees, and tiered packages that bundle hours with edited image counts. Corporate events and commercial photography typically command higher rates than social events. When learning how to price event photography, factor in travel, editing time, equipment costs, licensing, and overhead. Research local competitors and position your pricing to reflect your experience level and the value you deliver.
What should an event photography contract include?
A solid event photography contract template should cover the event date, location, hours of coverage, deliverables, payment schedule, cancellation and rescheduling terms, copyright and image licensing, model release language, and liability limitations. It should also specify the number of edited images, file formats, and delivery timeline. Including clauses about backup equipment responsibilities and force majeure protects both parties. Always have clients sign before the event to protect your business and set clear client expectations.
How do you capture candid moments at events?
Capturing candid photography requires blending into the environment. Use a longer focal length or a quiet shutter mode to avoid drawing attention. Anticipate moments by studying the event timeline and positioning yourself near high-activity areas like the entrance, bar, or stage. Adopt a documentary style approach, observe interactions rather than directing them. Move continuously, stay light on your feet, and shoot in bursts during key moments such as reactions to speeches or spontaneous guest interactions.
What gear is essential for event photography?
A reliable event photography gear list includes two camera bodies (for redundancy), a fast prime lens such as a 35mm or 50mm f/1.8, a versatile zoom like a 24-70mm f/2.8, an external flash with a diffuser, multiple high-capacity memory cards, and a comfortable gear bag. Backup batteries, a monopod for long events, and a portable hard drive for on-site backup round out a professional kit. For corporate events and weddings, having backup equipment is non-negotiable to ensure uninterrupted event coverage.
This article was written using GrandRanker