Table of Contents
- What Makes Good Event Photography: Core Principles
- Essential Event Photography Equipment and Gear
- Mastering Event Photography Camera Settings
- Candid Event Photography: Capturing Authentic Moments
- Practical Event Photography Tips for Success
- Post-Processing, Delivery, and Professional Standards
- Legal Contracts, Expectations, and Protecting Your Work
- Avoiding Common Pitfalls in Event Photography
What Makes Good Event Photography: A Professional Guide
Last Updated: July 24, 2026
What Makes Good Event Photography: Core Principles
Good event photography merges technical mastery with genuine storytelling. It’s the ability to anticipate moments that matter, not just moments that happened. Think like a journalist documenting history in real-time: that gala is the moment donors connected with a mission; that conference is where partnerships formed and ideas sparked. Your job is to prove it happened and make people feel why it mattered.
Professional Photography Standards from the Professional Photographers of America outline core competencies that separate professionals from amateurs: technical skill, client communication, reliability, and the ability to deliver under pressure.
Storytelling Through Visual Narrative
Professionals treat event photography as storytelling, not coverage. A single handshake means nothing; a sequence showing the moment before, the handshake, and genuine reactions afterward tells the story of a partnership forming.
Learn to anticipate moments that matter. Before the event, know the schedule, key people, sponsor priorities, and the organization’s mission. This transforms you from passive observer into active storyteller. Composition guides the viewer’s eye to what matters: position yourself so the audience is visible behind a speaker, showing impact, not just the speaker alone.
Create a shot list with your client before the event. Include specific moments (award presentations, keynote speakers, sponsor recognition), key people, and emotional beats. This transforms vague expectations into concrete deliverables.
Technical Excellence Meets Artistic Vision
Technical excellence without artistic vision produces emotionally hollow images. Artistic vision without technical skill produces blurry, poorly exposed moments. The balance separates professional event photography from casual documentation.
Develop "muscle memory" for your camera so you adjust settings by feel, freeing your mind to focus on the moment, light, and composition. When you’re not thinking about shutter speed, you’re seeing the genuine expression crossing someone’s face.
Essential Event Photography Equipment and Gear
Event photography demands fast lenses, reliable autofocus, and backup everything. A failed shot at an event can’t be re-shot.
Camera Bodies and Fast Lenses
Your camera body matters less than having one that autofocuses reliably in low light and shoots at high ISOs without unusable noise. Fast lenses, f/2.8 or wider, are non-negotiable. They gather more light in dim venues, create shallow depth of field for subject isolation, and enable faster shutter speeds without excessive ISO.
A typical event kit includes:
- One wide-angle fast lens (16-35mm f/2.8 or 24-70mm f/2.8) for room context and group moments
- One telephoto fast lens (70-200mm f/2.8) for candid moments from distance and detail shots
- Backup camera body with the same lens mount
- Additional fast primes (35mm f/1.4 or 50mm f/1.4) for extreme low-light situations
Showing up with only one lens is a single point of failure. Always bring backup lenses and ideally backup camera bodies. Professional event photography assumes you have redundancy built in.
Critical Backup Gear and Accessories
Backup gear is mandatory. Carry at least three fast memory cards (UHS-II), three fully charged batteries, plus one emergency backup. A sturdy tripod or monopod stabilizes shots in low light. A dedicated external flash with diffuser and spare batteries ensures low-light capability.
| Backup Item | Why It Matters |
|---|---|
| Extra memory cards (3+) | Capacity and redundancy |
| Extra batteries (3+) | Camera won’t die mid-event |
| Backup camera body | Equipment failure protection |
| Extra lenses | Flexibility and backup |
| Flash + diffuser | Low-light capability |
| Tripod or monopod | Stability in low light |
Professional photographers think in terms of redundancy. Every critical component has a backup.
Mastering Event Photography Camera Settings
Event venues rarely offer ideal lighting. Master these fundamentals so you can focus on the story.
Aperture, Shutter Speed, and ISO in Practice
Shoot wide open (f/2.8 or wider) whenever possible to gather maximum light and isolate subjects from distracting backgrounds. Use the reciprocal rule for shutter speed: at 70mm, use at least 1/70th of a second; at 200mm, use at least 1/200th. In low light, accept slightly slower speeds and compensate with image stabilization.
ISO is your light amplifier. In bright outdoor ceremonies, shoot ISO 100-400. In dim ballrooms, regularly shoot ISO 1600-3200 or higher. Modern cameras handle high ISO reasonably well; slight noise is far preferable to underexposure or motion blur.
In [event photography](/corporate-event-photography-tips/), proper exposure matters more than low noise. A slightly noisy but sharp, properly exposed image beats a clean but blurry or underexposed one.
White Balance and Exposure Management
Event venues mix light sources: fluorescent overhead, tungsten uplighting, LED accents, and natural daylight. Shoot in RAW format so you can adjust white balance during post-processing without losing quality.
Set a custom white balance before the event by photographing a white card under the primary venue lighting. This won’t be perfect with mixed lighting, but it’s far better than auto white balance.
Use exposure compensation to maintain consistent exposure as you move through different lighting zones. Bracketing, shooting the same moment at three different exposures, provides insurance in mixed lighting.
Candid Event Photography: Capturing Authentic Moments
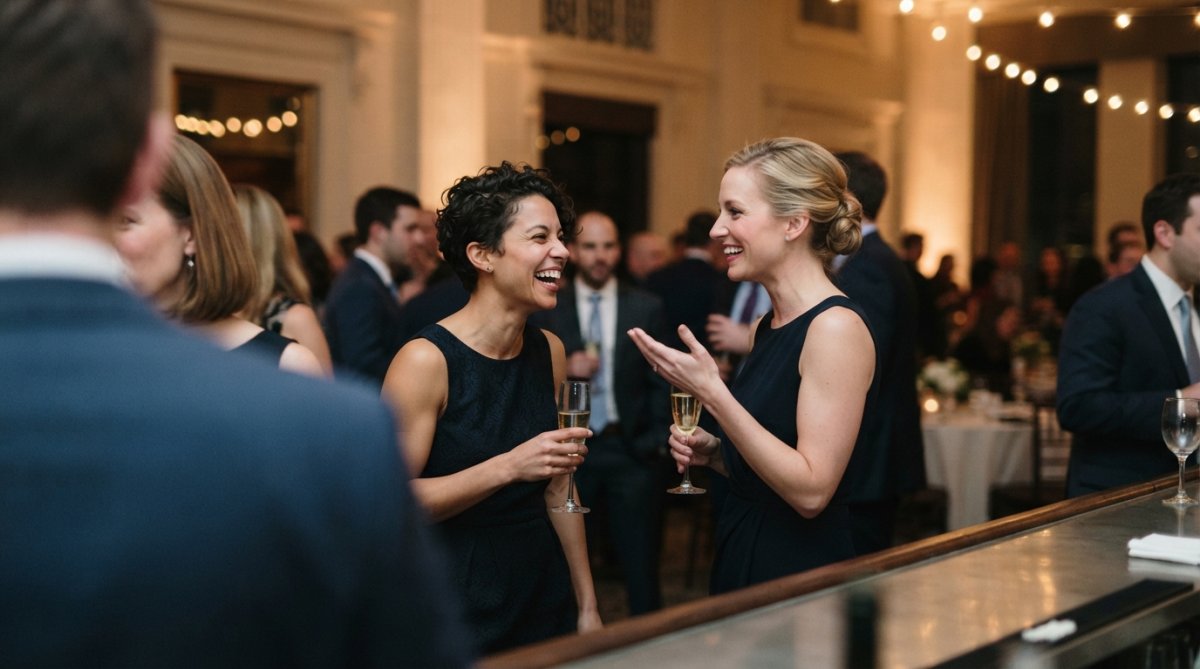
Candid moments are where the real story lives. Candid photography requires you to become nearly invisible, observing and anticipating rather than directing.
Building Rapport and Remaining Unobtrusive
Dress appropriately for the event. Your appearance signals whether you belong there and affects how comfortable people are around your camera. Position yourself where important interactions are likely to happen: near the bar, food, stage during speeches, entrance during arrivals.
Use longer focal lengths for candid work. A 70-200mm telephoto lets you photograph genuine moments from a distance. People are far more natural when unaware they’re being photographed.
Arrive early and scout the venue. Identify the best positions for different moments, notice where light is best, understand traffic flow. This preparation means you’re executing a plan, not scrambling during the event.
Anticipation and Composition in Candid Shots
Great event photography anticipates moments. During toasts, anticipate emotional peaks. During award presentations, anticipate genuine surprise or joy. Be positioned with your camera ready.
Composition in candid moments includes context. A candid moment of two people talking is stronger if you see the event happening around them. Shallow depth of field (f/2.8 with telephoto) isolates your subject; deeper depth of field (f/5.6 or f/8) provides environmental context.
Shoot sequences rather than single frames. Burst mode lets you shoot 5-10 frames per second. The third frame might be perfect, capturing the exact moment of genuine emotion. Professionals expect to shoot 3-5 frames for every 1 frame delivered.
Practical Event Photography Tips for Success
Pre-Event Preparation and Shot Lists
Preparation separates photographers who consistently deliver excellent results from those who sometimes struggle. Work with your client weeks before the event to understand their goals, key moments, and key people.
Create a timeline of the event. Know when speeches occur, awards are presented, meals happen, dancing begins. This timeline tells you where to position yourself and what moments to anticipate.
Research the venue. Look at photos of previous events there. Understand lighting challenges and identify best positions for different moments. Visit the venue beforehand if possible.
Create a detailed shot list including arrival moments, key speakers, award presentations, sponsor recognition, candid networking, food service, entertainment, closing remarks, and departures. Communicate with your client about what "good photos" means for their specific event.
Managing Low-Light and Difficult Lighting Environments
Low-light event photography demands fast lenses, high ISO tolerance, and image stabilization. Accept that you can’t make everything the same color temperature in mixed lighting. Shoot RAW and adjust white balance in post-processing.
Expose for your primary subject, accepting that other light sources will be slightly off-color. Backlighting creates silhouettes unless you use fill flash to illuminate the front of your subject while the backlight creates separation.
Never rely on venue lighting alone. Carry flash equipment and know how to use it. A well-placed fill flash separates your subject from the background and adds dimension.
Professional Workflow and Client Communication
Confirm all details in writing before the event: arrival time, parking, schedule, deliverables, number of photos, delivery timeline, and file format. During the event, stay professional and unobtrusive. Check in with your client periodically to confirm you’re capturing what matters.
After the event, deliver on your promises. If you promised photos within two weeks, deliver within two weeks. Deliver a curated selection of 200-400 images from an 8-hour event that tells the complete story without overwhelming the client.
Post-Processing, Delivery, and Professional Standards
RAW File Culling and Batch Editing Workflow
From 2,000 images, mark roughly 20-30% as keepers. In a second pass, narrow down further by removing duplicates and keeping only the strongest version of similar moments. You should end with 300-400 images.
Batch editing applies consistent adjustments across all images: white balance, exposure, contrast, and noise reduction. Individual editing refines specific images: cropping, exposure adjustments, removing distractions, enhancing colors.
Batch editing ensures consistency across all delivered images. Individual editing allows refinement. The combination produces a cohesive set of images that tell a unified story.
Fast Turnaround Without Sacrificing Quality
Workflow efficiency enables fast turnaround. Batch editing saves enormous time by applying adjustments to all images at once. Presets, pre-configured editing settings, accelerate your workflow further.
Deliver high-resolution JPEGs rather than RAW files; they’re smaller and upload faster while remaining suitable for print.
Professional Photography Workflow Standards from the Photo Industry Association emphasize that fast turnaround should not compromise image quality. Standard delivery is 2-3 weeks, though rush delivery within 48 hours is available for additional fees.
Legal Contracts, Expectations, and Protecting Your Work
A written contract should specify: event details, hours of coverage, deliverables, delivery timeline, payment terms, cancellation policies, usage rights, copyright ownership, and liability limitations.
You own the copyright to all images. Your client licenses the right to use those images for specific purposes. They cannot resell images, use them for commercial purposes beyond what’s agreed, or claim ownership.
Include clauses about image selection (you select based on technical quality and narrative value) and additional services (rush delivery, additional editing, prints incur additional fees).
Professional liability insurance and equipment insurance are standard for professional photographers.
Use a template contract reviewed by a lawyer familiar with photography contracts. Clear contracts prevent misunderstandings before they become problems.
Avoiding Common Pitfalls in Event Photography
Inadequate preparation leads to missed moments and incomplete storytelling. Relying on one lens or camera body gambles with your client’s event. Poor client communication causes disappointment even with technically excellent photos. Neglecting backup storage leaves you unable to fulfill future requests. Rushing post-processing undermines excellent shooting work. Ignoring copyright and contracts allows clients to use your images without permission. Unrealistic expectations lead to burnout.
Good event photography integrates three elements: technical excellence that frees you to focus on the story, preparation that ensures you’re ready for every moment, and professional execution that transforms those moments into delivered value. When you master the technical side so completely it becomes automatic, prepare so thoroughly you anticipate moments before they happen, and execute professionally from contract to final delivery, you stop taking photos and start creating visual assets that matter. CONTACT US to discuss how Event Photojournalism can elevate your next event with award-winning coverage that captures not just what happened, but why it mattered.
Frequently Asked Questions
What are the key elements that define good event photography?
Good event photography combines technical mastery with storytelling ability. It captures authentic moments through candid shots while maintaining professional composition and exposure. Essential elements include proper aperture and shutter speed settings for the venue's lighting, anticipatory positioning to catch genuine interactions, and a deep understanding of the event's flow and key moments. The best event photographers balance being present without being intrusive, delivering high-resolution images that tell a coherent narrative of the event while meeting client expectations for specific shots and VIP coverage.
What event photography equipment is truly essential versus nice-to-have?
Essential gear includes a reliable camera body, fast lenses (f/2.8 or wider), backup camera and lenses, extra memory cards, and fully charged batteries. Flash with a diffuser is critical for low-light venues. A sturdy tripod or monopod, lens cleaning supplies, and backup power solutions are necessary. Nice-to-have items include wireless flash triggers, additional focal lengths for creative angles, and portable lighting. The most important factor is having redundancy, backup equipment ensures you can continue shooting if primary gear fails, protecting both your reputation and the client's event coverage.
How do you capture candid event photography without being intrusive?
Successful candid event photography requires building genuine rapport with guests while remaining observant and patient. Position yourself at the periphery of conversations and activities rather than directly in front of subjects. Use longer focal lengths (telephoto) to maintain distance while capturing intimate moments. Anticipate interactions before they happen by understanding the event timeline and watching for emotional peaks. Dress professionally and move with purpose so you blend into the environment. The goal is to document authentic moments as they naturally unfold, not to stage or interrupt them. This approach yields images that feel genuine and emotionally resonant.
What camera settings work best for most event photography situations?
Start with aperture between f/2.8 and f/4.0 to manage depth of field while maintaining shutter speed fast enough to freeze motion. Use shutter speed of at least 1/125th of a second indoors, faster for movement-heavy events. Set ISO to auto with a maximum limit based on your camera's performance (typically 1600-3200 for modern cameras). Use aperture priority mode to maintain control over depth of field while the camera adjusts shutter speed. Shoot in RAW format for maximum post-processing flexibility. Adjust white balance based on venue lighting, use custom white balance presets for consistent color across different lighting conditions throughout the event.
This article was written using GrandRanker